Last update: 12/16/2019 3:56PM
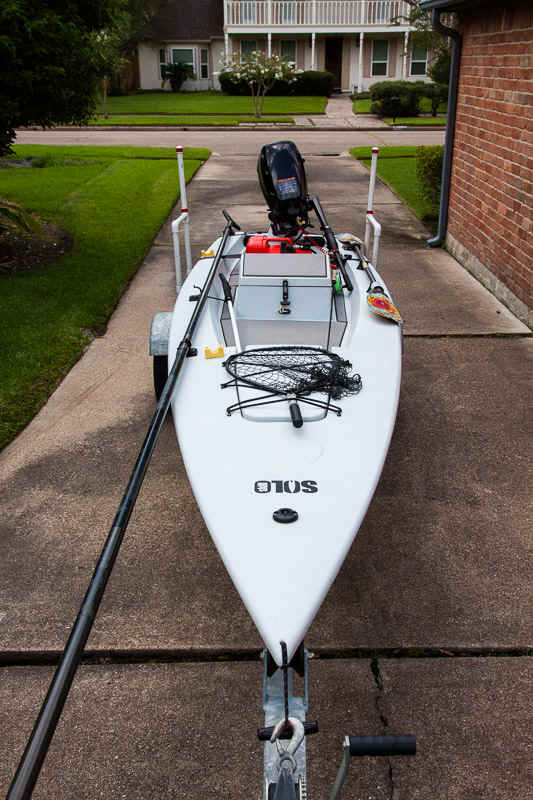
First off, a hearty thank you to Tom Mitzlaff for designing and producing the Solo Skiff. I have owned my rotomolded Solo Skiff for over a year. It is quite simply the one of the most fantastic fishing machines that I have ever used. I have owned fishing boats - large and small - since the 1970's. I have also owned and fished extensively from several kayaks over the past 10 years. The Solo Skiff is far and away my favorite among all of the fishing boats that have been part of my life. Of course, this statement should be taken with the understanding that I am a skinny water fly fisherman. I seldom fish in water that is more than a foot or two feet deep. With its long range and two-inch poling draft, the Solo Skiff has opened up many places that have previously been unavailable to me.
This is what it's all about:
My Solo Skiff is no speed demon. At wide open throttle, it happily hums along at about 15mph, but it does so while using only about half a gallon of gasoline per hour. My little 3 gallon fuel tank will take me over 100 miles! I fill my tank about every other fishing trip, and I rarely have to add more than a gallon to fill it. Whatever the cost of gasoline, I can afford to fish!
Here, I am presenting many of the things that I have learned about this fine little boat. Again, I am a fly fisherman, so some of the things that I present may not be useful to you. However, I think almost any Solo Skiff owner will find a few things here that will be applicable for them.
A lot of people go over the top while rigging their new Solo Skiff. I have learned from experience to not add anything to a new boat until the boat tells you that it needs it. Above all, do not add anything simply because it looks cool or because you are trying to keep up with the crowd. That is a great way to waste money while not adding any usefulness to a boat.
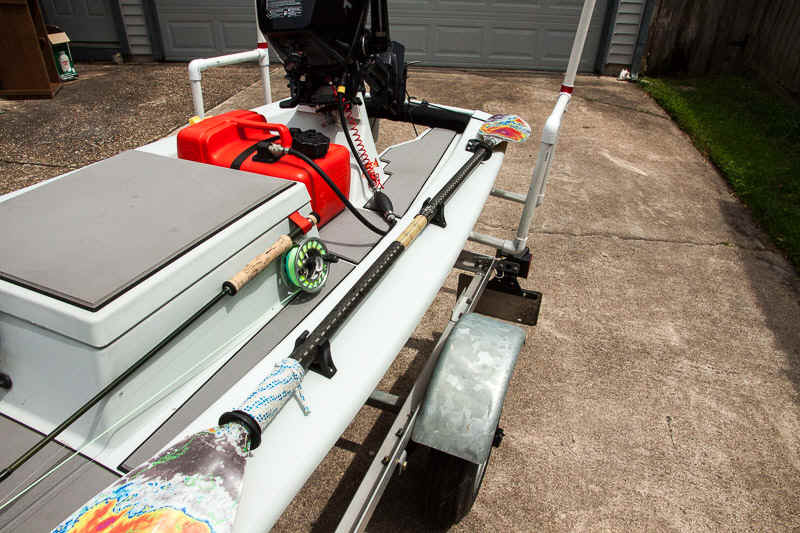
Even though the Solo Skiff is rated for a maximum of 5hp, I and very many others have chosen to use a 6hp outboard for power. I selected a Tohatsu outboard because I have had excellent experience with Tohatsu engines. Other than decoration, the small Tohatsu engines are exactly the same engines as Mercury and Nissan, made in the same factory, just painted differently for the specific brand. The only difference between the 4, 5, and 6hp engines is the carburetor and propeller - they all weigh the same. If they are the same size and weight, then I want the biggest available. That extra horse makes a little bit of difference in top end speed, and it comes in very handy when trying to get up on plane over a shallow mud bottom.
Many Solo Skiff owners also have an electric trolling motor, and a few use an electric trolling motor only. I have no use for a trolling motor. With the battery required, a trolling motor would add weight and complexity, which I abhor. Also, a trolling motor would be something for fly line to get snarled on. I think that I handle a fly rod decently, but fly line just seems to have a mind of its own. For me, it will consistently find the slightest little thing to get tangled on, and almost always does so when a fish is in sight.
The 6hp engine comes with an 8" pitch propeller. With a new 8" propeller, I have seen speeds of up to 17mph on flat water with very slight ripples on it. I have experimented with other propellers. A new 7" pitch propeller will only give me about 13mph in the same conditions, and a new 9" propeller will give me only about 15 mph. The 8" pitch propeller is definitely the correct one.
My shallow-water fishing exposes my propeller fairly often to oyster reefs and rocks, so my props do not stay new for very long. I find that my "seasoned" 8" propller will reliably give me 15mph.
A tiller extension is a must-have. I use a Minn-Kota 18 inch extension, which really adds only about 13 inches to the actual tiller length. The extension reaches just to the rear of the hatch. It makes steering comfortable without having to lean back and it does so without interfering with steering while seated.

While this is not really rigging, it is worth noting. Always have your kill switch attached to you while running the engine! I was running at full speed in muddy water a couple of feet deep when I ran up on a submerged post that was invisible from the surface. When I hit the post, it rolled my skiff violently enough that I was instantly thrown overboard. Because I had my kill switch lanyard on my wrist, the engine immediately shut down. When I pulled myself from the mud, my Solo Skiff was sitting less than 6 feet from me.
I do not have a fish finder or depth sounder on my Solo Skiff, and the only GPS that I have aboard the boat is a handheld Garmin GMSMAP 78sc. I do not want anything unnecessary mounted forward of the hatch because it will be a fly line magnet. If you are not a fly fisherman, then by all means go for it and add your electronics. I tie the hand strap my my GPS to the end of the waist strap of my PFD and keep the GPS in my pocket.
Being a flats fisherman, the only purpose of my outboard engine is to get me to the flats. Once there, my propulsion is by push pole. Since I am poling for hours and many miles, I want the lightest and most efficient pole that I can get. Up to a point, the longer the pole the better. The longer the pole is, the more efficient your poling is and the fewer times you will have to lift the pole from the water.
When poling from the top of the hatch, the water is about five feet below your hands. Add a foot of water, and the bottom is six feet below your hands. So, with a 6 foot pole, you would only be able to push a very short distance on each stroke. Each additional foot of pole length adds about another foot that you can push on each stroke.
The Solo Skiff's length and freeboard limit the practical maximum length of the push pole. While running on plane, one of two things will happen if the pole is too long: either the part of the pole overhanging the stern will drag in the water behind the stern or the part of the pole overhanging the bow will vibrate violently in rough water.
I found that a 17 foot pole is ideal for me. I bought a 19' 6" TFO Mangrove push pole and cut it to 17 feet when I was assembling it. The TFO Mangove poles are all carbon fiber, making them light and stiff, and they come in sections making them available by mail order. A 19' 6" TFO Mangrove pole costs less than $300. That is a great price for an all-carbon push pole.
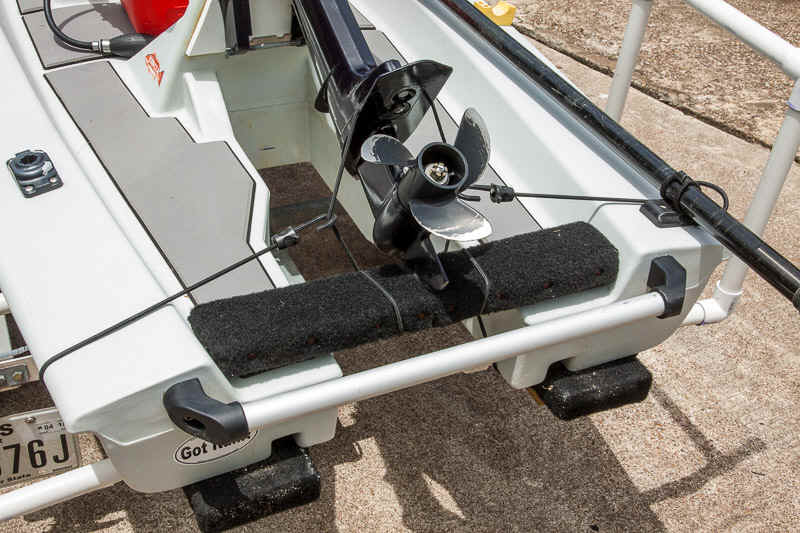
The transom on the Solo Skiff is plenty strong for an outboard motor. However, I chose to make a couple of modifications to the transom on my Solo Skiff.
On my first few outings, I found that I had to aggressively tighten my engine mounting screws to keep my engine from sliding on the transom. After a bit of running, the transom would compress slightly and I would have to tighten again. If I did not keep the screws as tight as possible, the engine would either slide slightly to one side or the other, or one side of the engine would rise up on the transom so that the engine was no longer vertical. To solve this problem, I added a plate made from 1/4" thick high-density polyethylene (HDPE) to the front of my transom. I used a spade bit in my drill to cut shallow circular recesses where the engine mounting bolts would be. (Note that HDPE is sold as "Starboard", and is the same material that is commonly used to make ordinary kitchen cutting boards.)
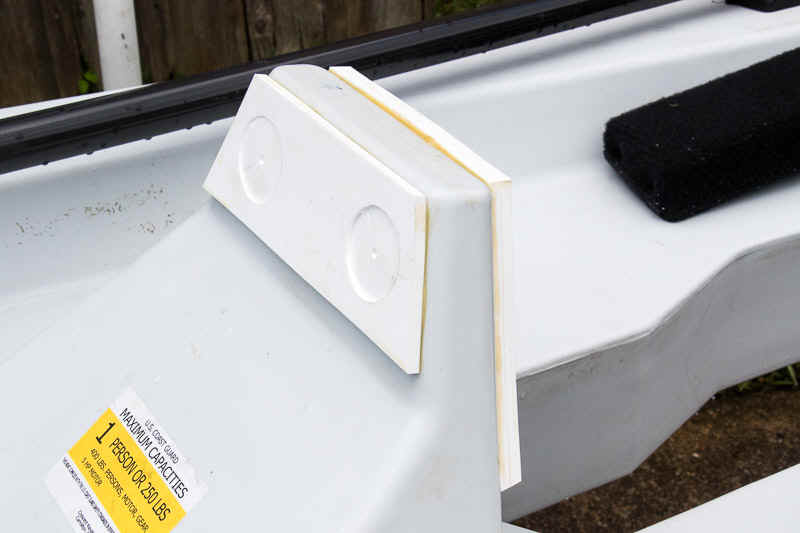
With the feet of the engine clamp screws placed in these recesses, the engine is very firmly secured in place on the transom.
I also added a plate made of doubled HDPE (total 1/2" thick) to the rear of my transom. Doing this moved the engine back 1/2" on the transom and let me drop the engine trim down to the second hole, which added about 1mph to the top end speed of my boat. Also, the raised "teeth" on the rear part of the engine mounting bracket were able to dig into the HDPE board, again maing the engine mount more secure.
Now, I have good clearance between the engine cavitation plate and the hull of the boat with the trim set to the second hole. Note that adding both plates increased the transom thickness by 3/4". Mounting the engine over the thicker transom is barely possible because the thickness is now very close to the gap between the engine mounting screws and the engine with the screws fully loosened.
I did not use any screws or bolts to attach the plates to the transom. I used only West System G/Flex epoxy. In order to get the strongest bond, I followed the G/Flex instructions for alcohol wipe and flame treatment of both the transom and the plates.
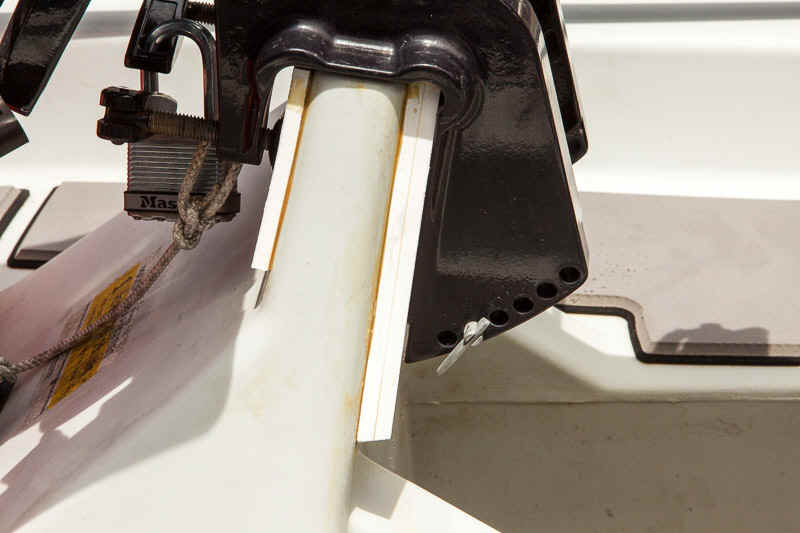
The Solo Skiff owner's manual says that you should not store your engine on the Solo Skiff. This is because, over time, the weight of the engine will deform the transom - especially if your boat is stored in a hot location. I keep my Solo Skiff on a trailer, and I do not want to have to remove the engine. So, to take the load off of the transom while trailering and storing, I made a simple "transom saver" from a piece of 2x4 covered with trailer bunk material.
I cut a small slot in the center for the foot of the engine to rest on.
I drop the engine from the tilted position on to the transom saver and use bungee cord to hold the lower unit securely on the transom saver.
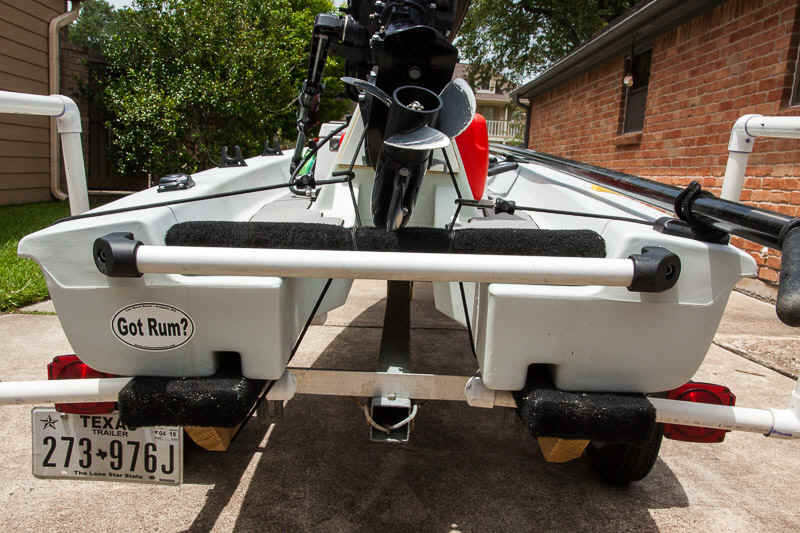
Note that the transom saver is securely held down by bungee wrapped around the bottom of my trailer. Without this, if you hit a bump while trailering, the engine will bounce up onto the tilt lock, taking the load off of the transom saver and putting it back onto the transom itself, with the additional load of the weight of your transom saver.
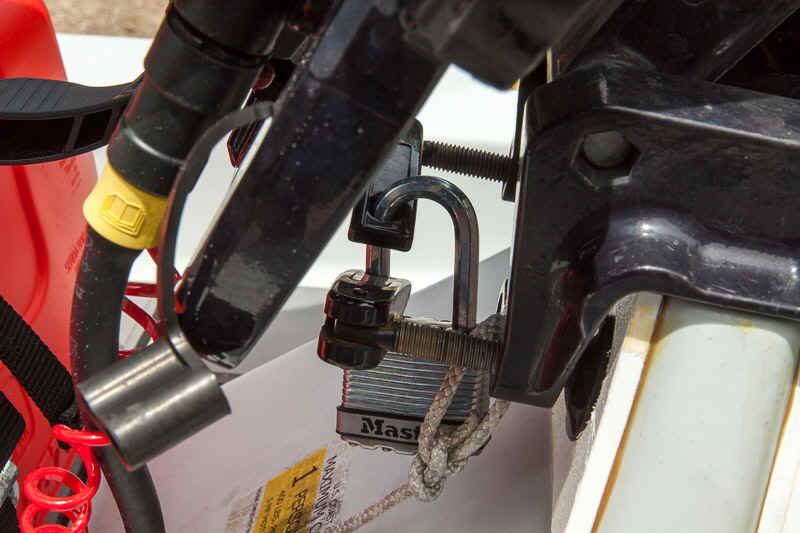
A padlock will fit into the holes of the engine mount screw arms. This makes it a bit more difficult for your engine to walk away during the night.
Nope. I pole from the top of the hatch, so a seat would be very much in the way. Pretty much the only time that I am sitting down is when I am running the engine. I have made single runs of 15 miles or more. On long runs, I find it comfortable to sit sideways on the hatch so that the end of the tiller extension is more or less in front of me.
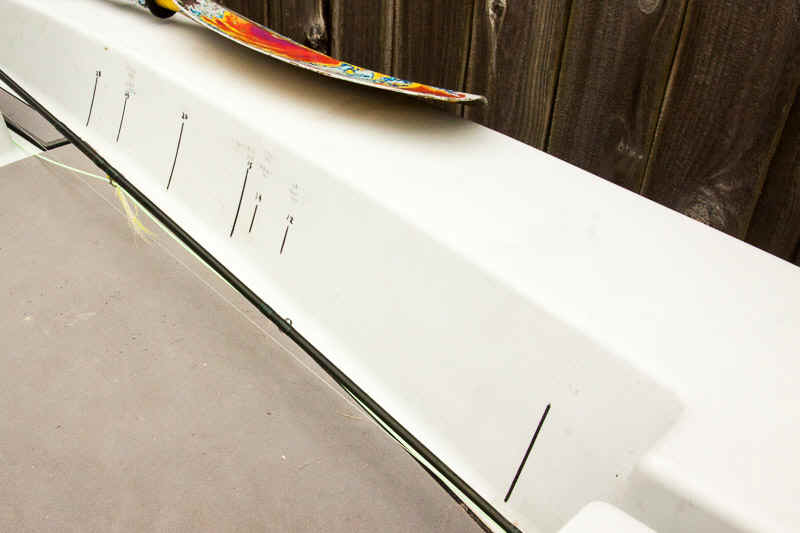
I used a Sharpie, yardstick, and straight edge to create a fixed ruler on the side of my cockpit. Again, keeping it simple. I do have to re-mark it occasionally as it does become lighter with time, but it is one less thing to have to keep up with while on the water.
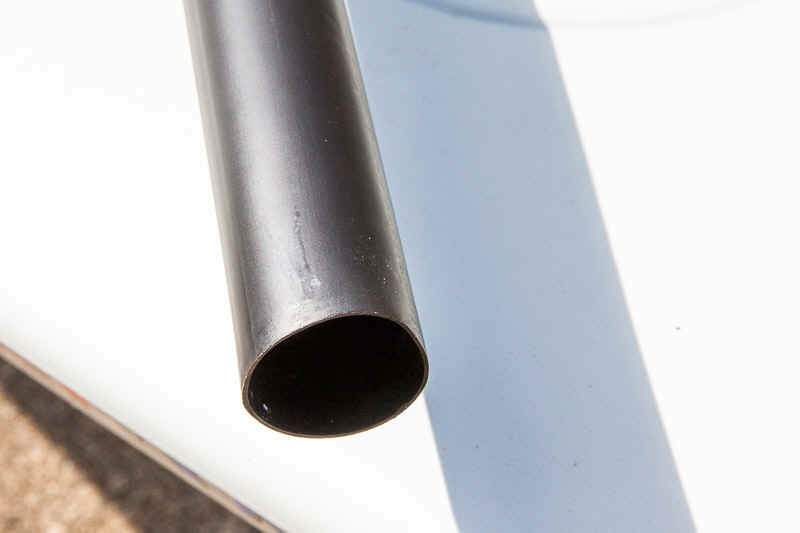
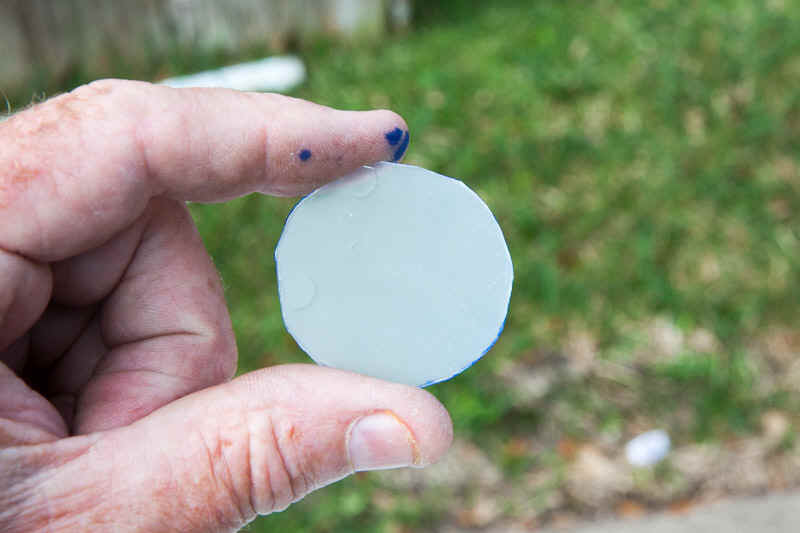
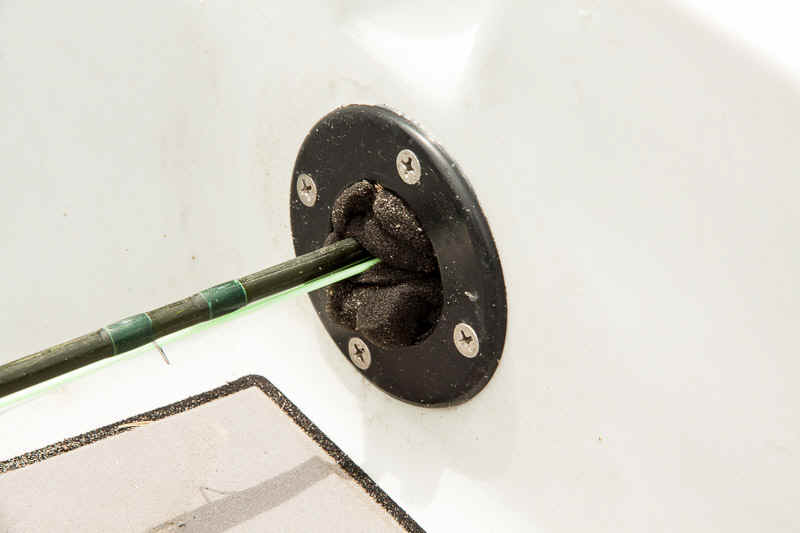
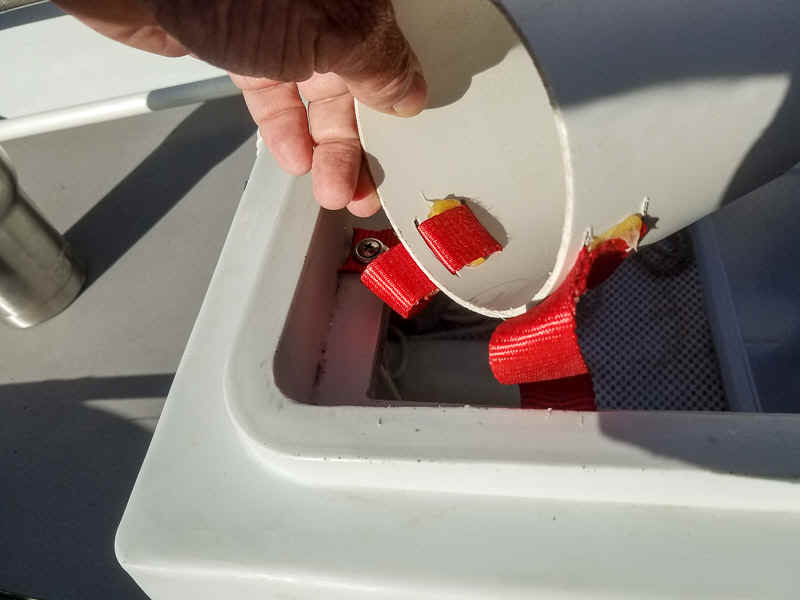
After a while, I noticed that I was getting water into the hull of my Solo. I would come in from fishing and find the inside of the hull moist and most things below deck wet. I figured out that the water had to be coming in through the rod tubes. The water was probably getting in when I ran my motor in reverse, which put the stern below the waterline and caused a little bit of water to run forward through the floor of the skiff. I would occasionally do this on purpose to flush mud and grass from the floor. So, I removed the rod tubes and found that the factory installed plugs in the end of them were broken. Most likely, I broke or punctured the caps on both tubes with my fly rod or with my stakeout pole. I am not gentle with things!
To solve the problem, I cut slices about an inch and a half thick from a swimming pool noodle.
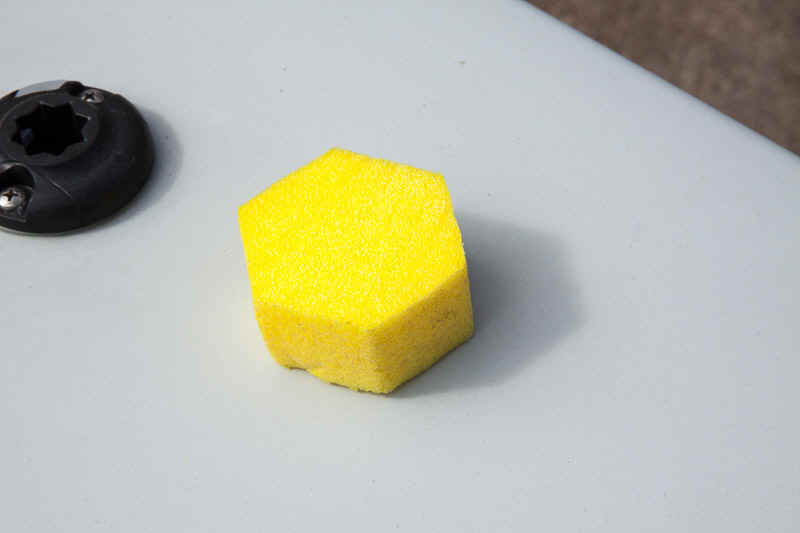
Then, I gently pressed and twisted the open end of one of the rod tubes into the foam slice to cut a round plug.

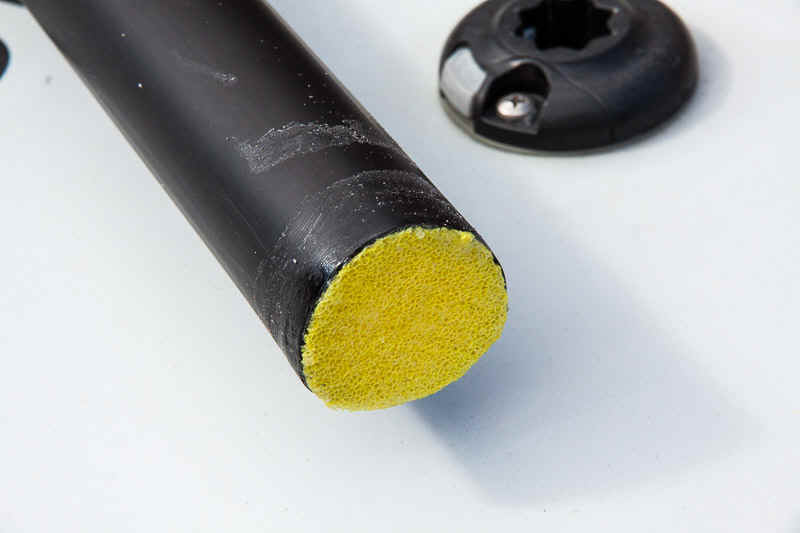
Next, I took a couple of plastic dividers from an old tackle box tray (we all have them somewhere in the garage).
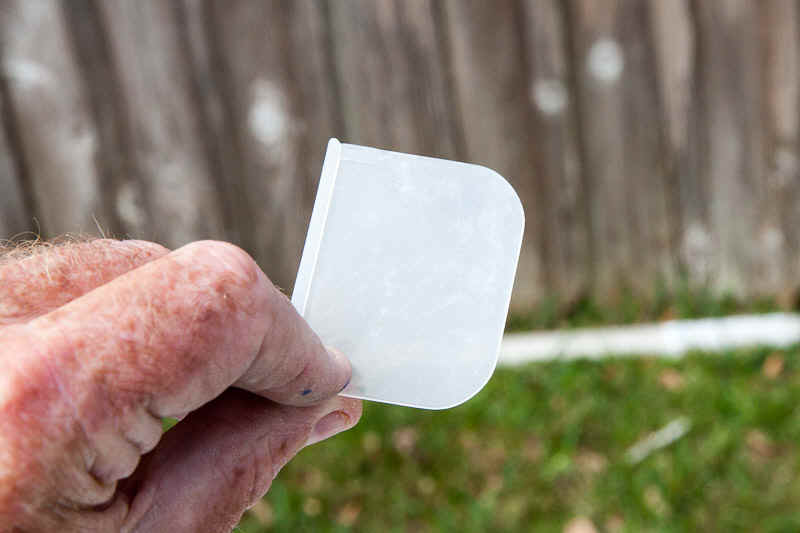
I traced the outside of the plugs that I cut onto the plastic, then used scissors to cut out discs that just fit into the end of the rod tubes.
I used Goop to glue the plastic discs to the foam plugs.

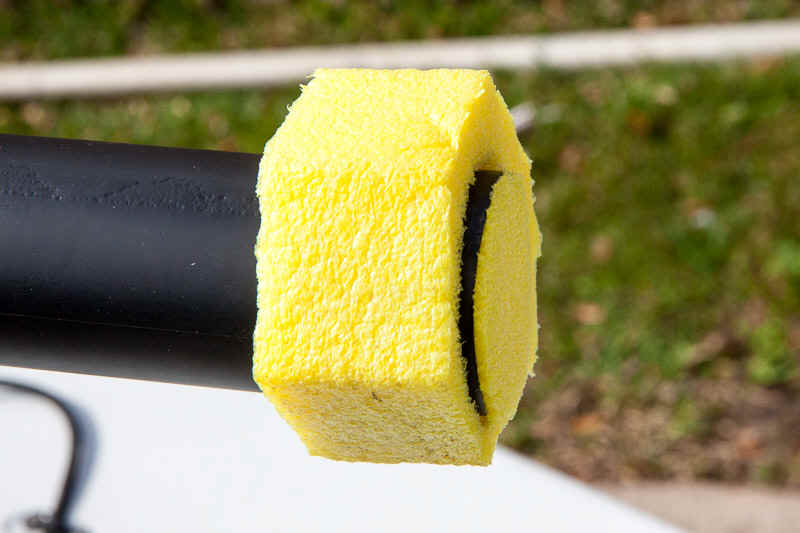
Then, I used Goop to glue the plugs into the rod tubes, with the hard plastic disc to the inside. That makes the tube plugs very durable and secure.
Also, when I removed the rod tubes, I found burrs around the edges of the cutouts, and no sealant around the holes. This would also allow some water to get into the hull.
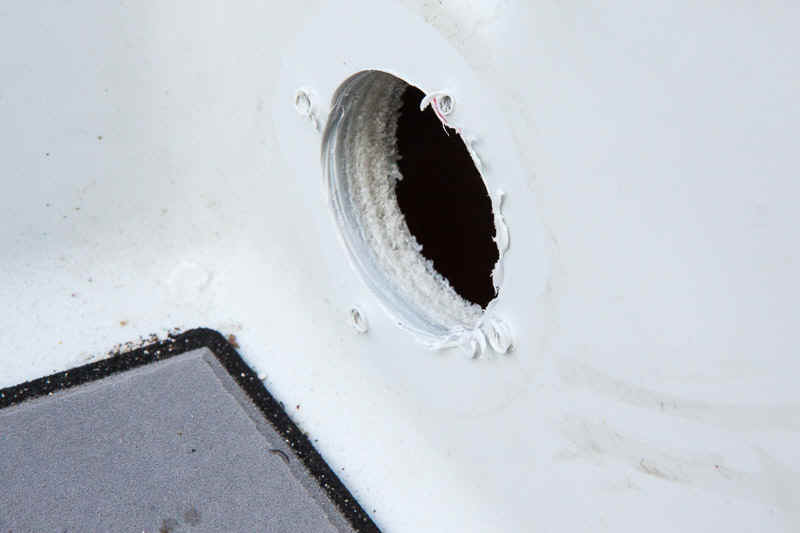
I used my knife to trim away all of the burrs.
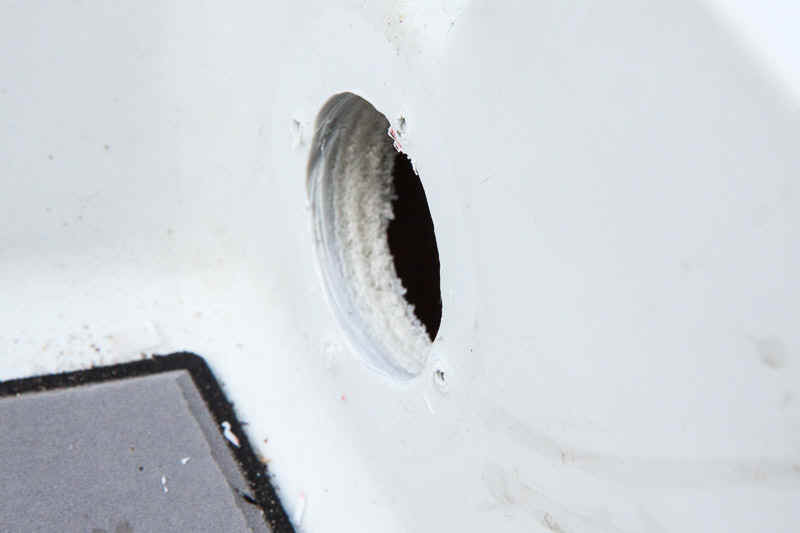
Then, when I reinstalled the rod tubes, I used silicone to seal around them.
Since doing this, I have never had a drop of water inside my hull. Everything below is dry!
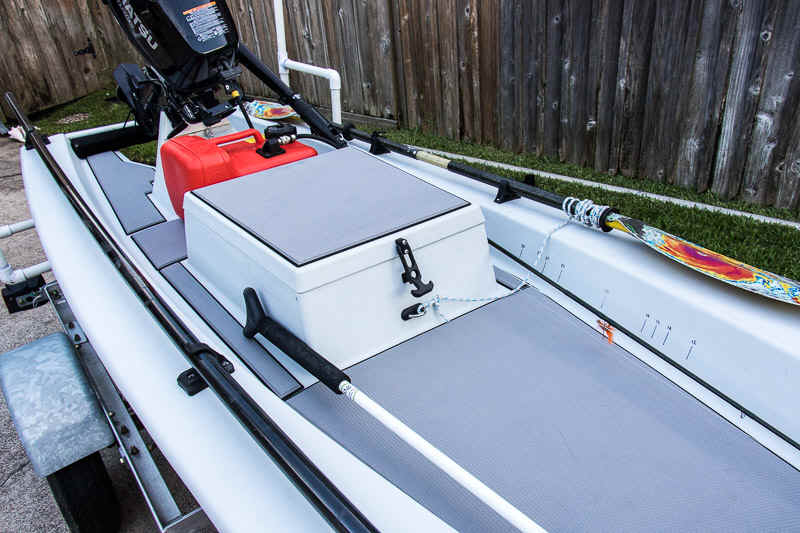
I covered the floor of my Solo Skiff with MarineMat. It makes the boat much quieter, better non-skid, and the soft surface is much easier on my feet than the uncovered deck was. MarineMat makes a kit for the Solo Skiff that is very easy to install for about $250.
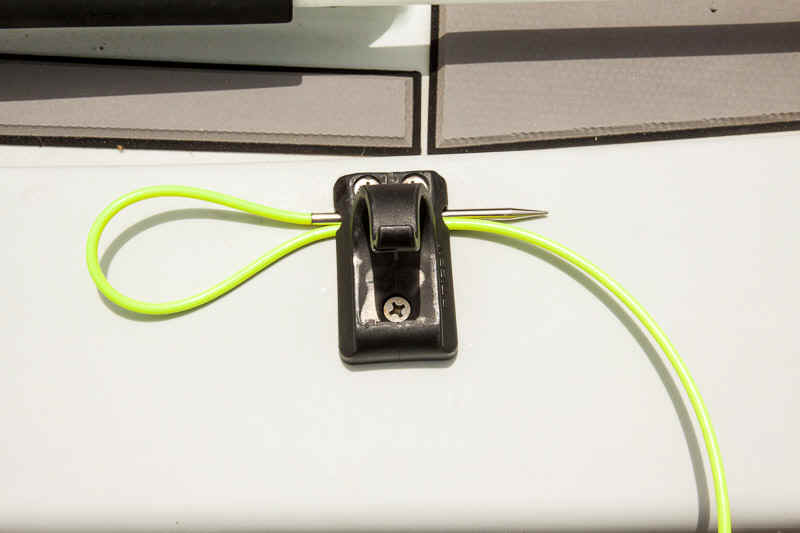
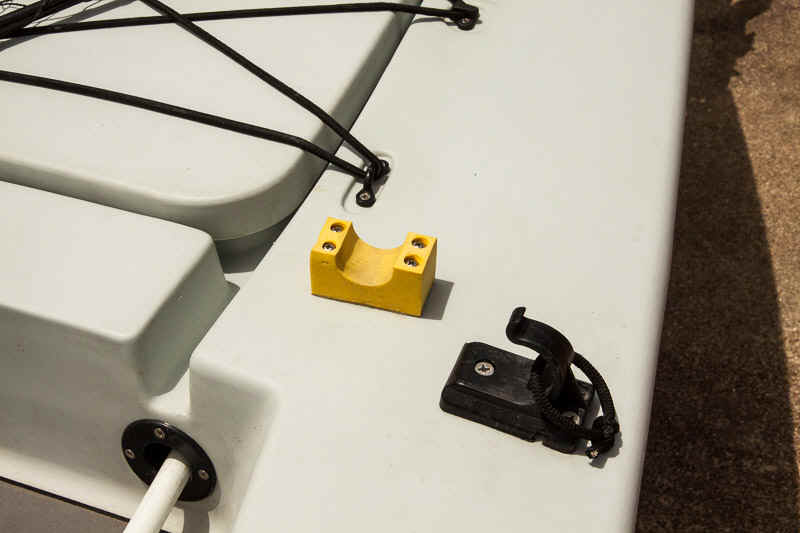
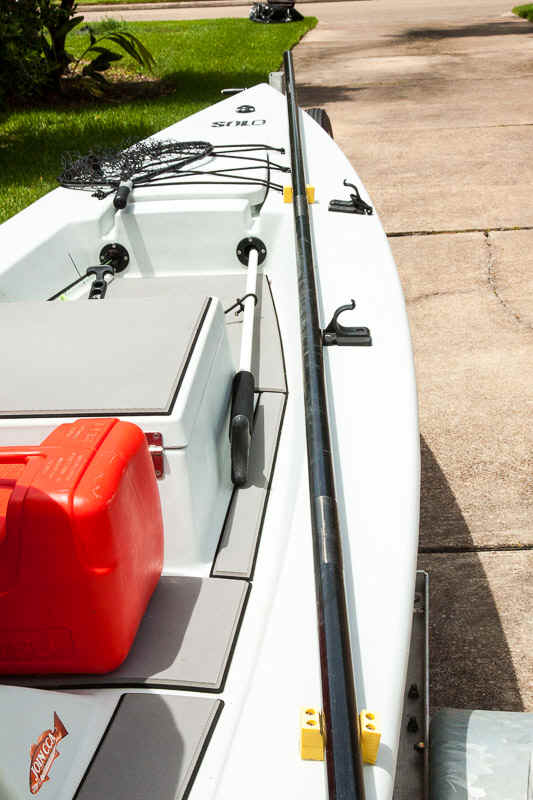
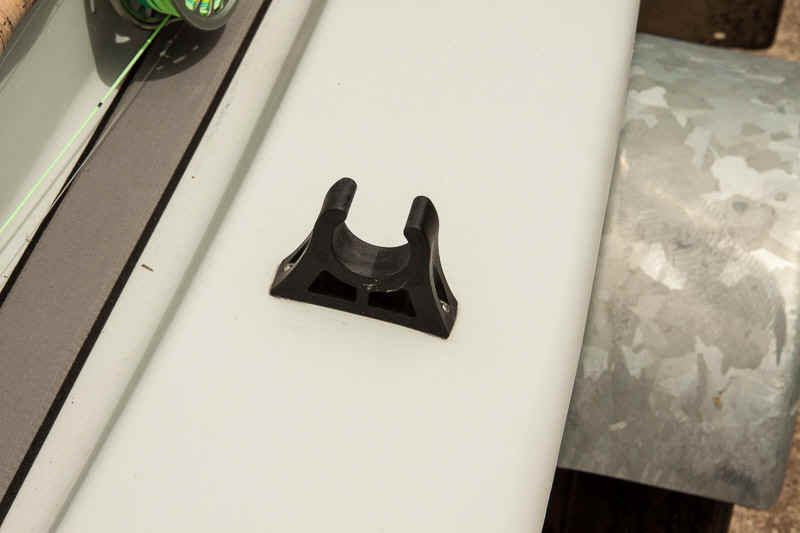
I found that Stiffy push pole clips work very well with the TFO push pole on the Solo Skiff.
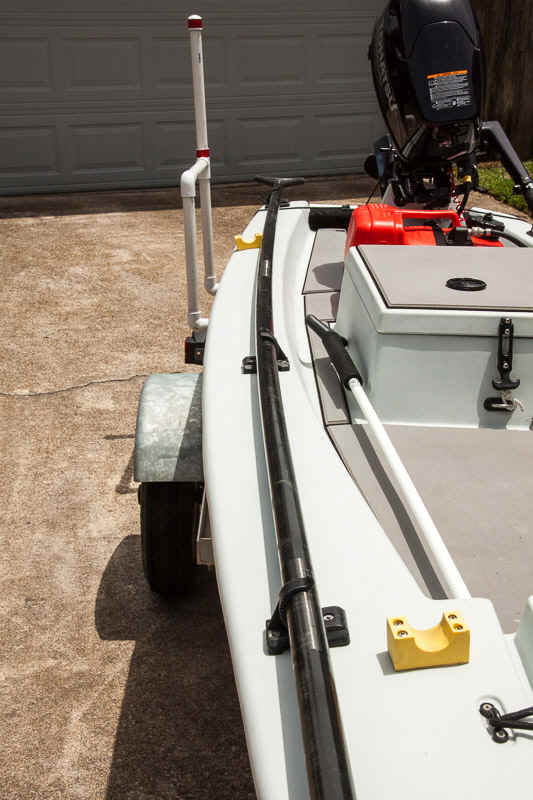
From the stern, the positions of the three clips are:
I used stainless steel sheet metal screws to mount the clips. Note that the outboard clips are about an 1 1/4 inch inside the outer gunwale edge. This is because the gunwale overhangs the hull by about an inch. The screws need to be far enough inside the gunwale so that they go into the hull and not come out the bottom of the overhang.
To secure the pole while trailering, I made loops of 1/4" bungee. The inside diameter of each loop is 2 inches. Make sure that you pull the knots in the loops as tight as possible!

To lock the pole down, put the loop over the clip, put the pole into the clip, and then hook the other end of the loop over the top of the clip. The loop should have a lot of tension on it.
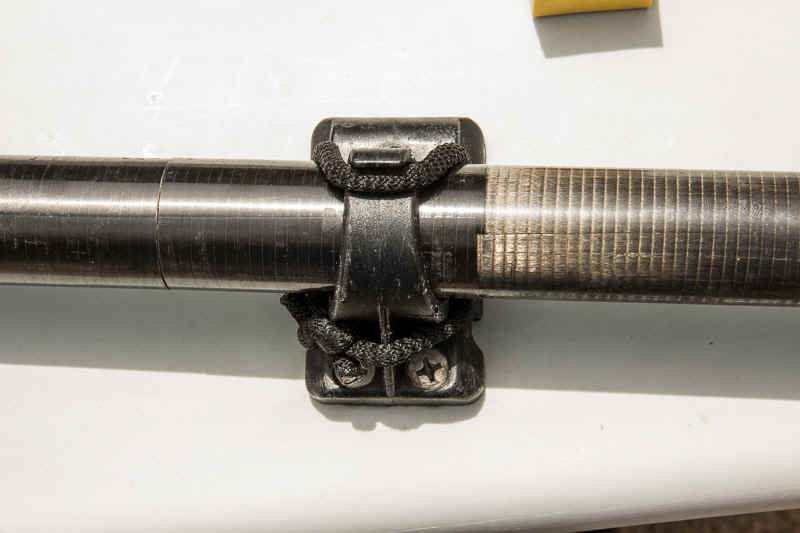
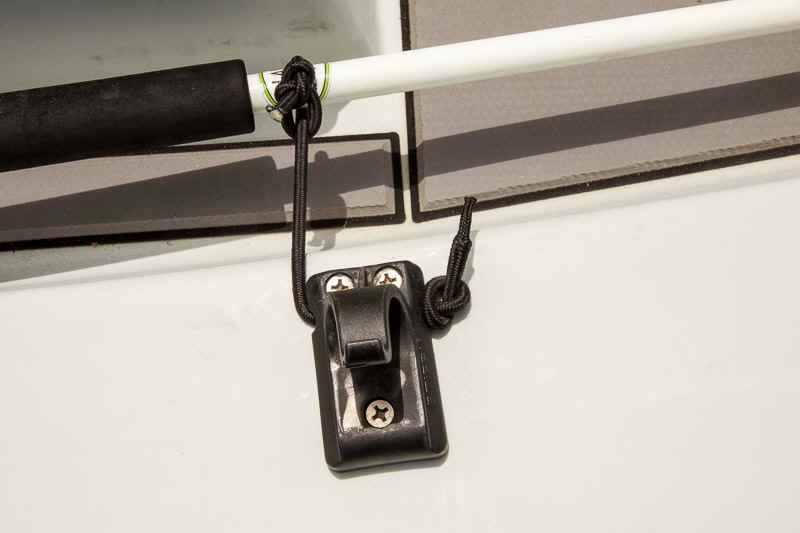
Note that while trailering or in storage, the pole is stored without bend in it by having it out of the middle clip and held in place by the bungee loops.
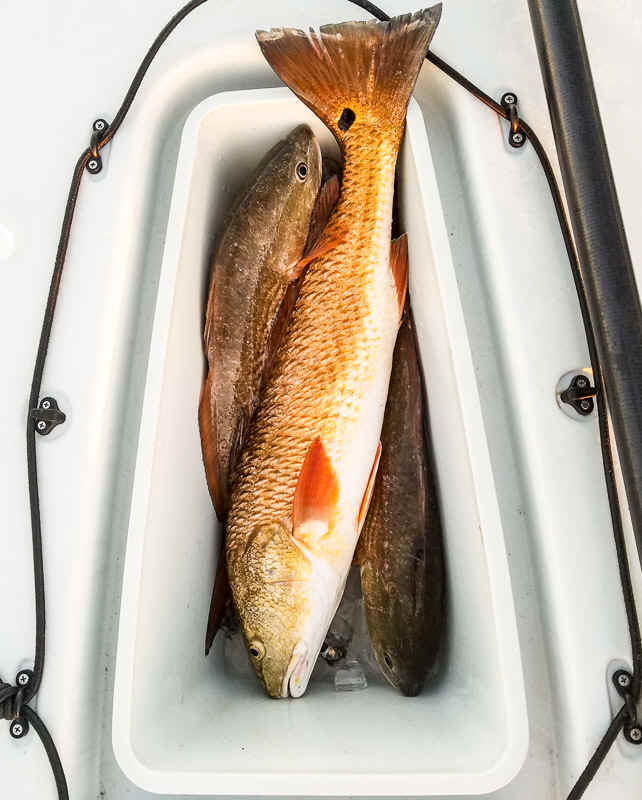
The Stiffy clips have a slot through the base of the clip. The purpose of the slot is to hold a bungee, which would be used like the loops above. However, I find the slot to be more useful as a stringer holder. If you put the needle of a stringer through the slot, then double it back, the stringer is held very securely yet can be quickly released to add another fish.
I also use the slot in the middle clip to secure my stakeout stick (Wang 8' fiberglass anchor pole with stainless steel point) while trailering. I keep the stick in the rod tube on the right side. I loop a piece of bungee over the stick, put the end through the clip slot, pull a little bit of tension, and tie an overhand knot to hold it in place.
A problem with poling alone is that you do not have a fisherman with fly in hand on the bow when you spot a fish. Instead, you have a push pole in your hands. You have to manage both the push pole and the fly rod while alone. Stalking redfish in skinny water requires absolute stealth. I found that it was very difficult for me to lay the pole down on the deck silently when I spotted a fish. Also, when the pole was laying on the deck, it would occasionally roll off or it would noisily roll into something, which seemed to always spook fish.
The solution to this problem came to me when I saw my granddaughter playing with a set of EVA foam blocks. My wife had found these at Goodwill for about $3 for the entire set.
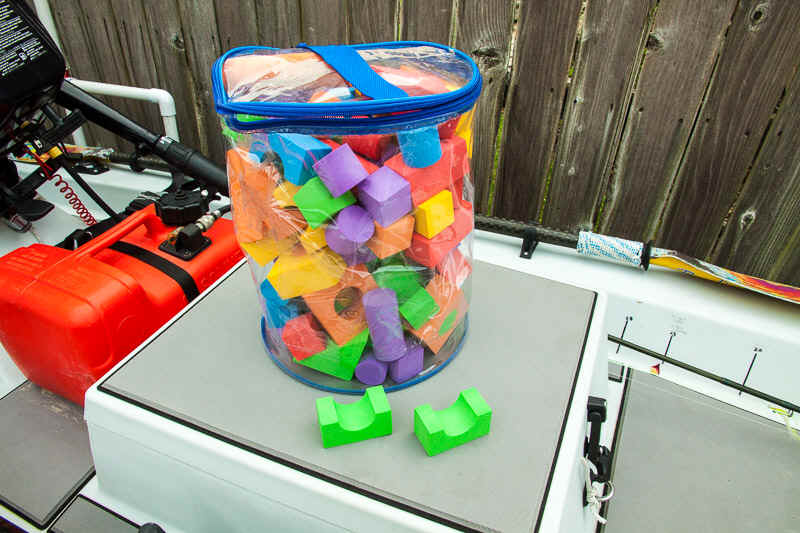
The set had some blocks that had a circular cutout that appeared to be about the size of my push pole. I took one and gave it a try and sure enough, it fit my push pole perfectly. I traded my granddaughter some ice cream for a couple of blocks from the set.
I used a Dremel tool to cut holes into the blocks, then used round head sheet metal screws with washers under the heads and double-stick foam tape under the blocks to mount two of them on my deck. I was unsure as to how long they would last. They have now been in use for over three years and appear to be in as good a condition as they were when I first mounted them.
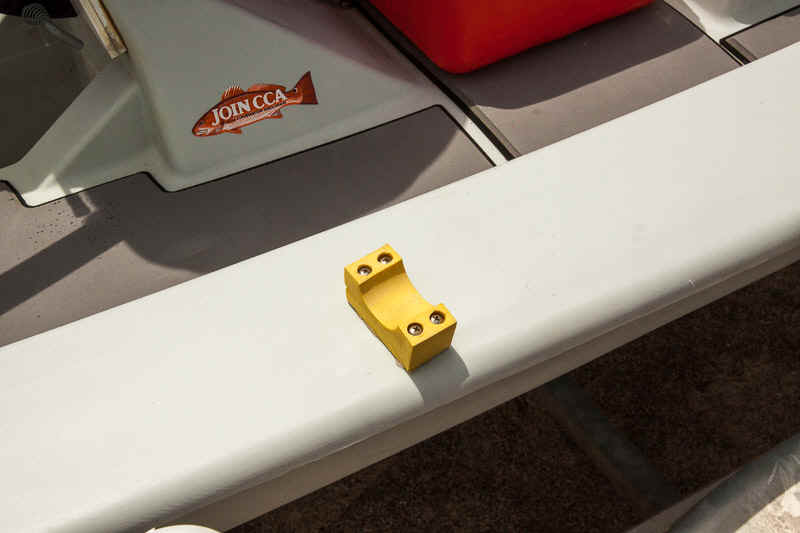
I can now very easily bend over from the hatch top, put my pole down into the foam blocks and lift my fly rod without making any sound whatsoever. When the pole is laying in the blocks, it is secure and will not roll around. This is one of the best additions that I have made to my Solo Skiff.
A lot of Solo Skiff owners (myself included) were previous owners of kayaks. For a kayak fisherman, a "milk crate" secured in the well behind the seat is the standard storage method for all fishing gear.
A Solo Skiff is not a kayak. It has a huge amount of storage space below the deck. A crate will only fit under the hatch and the crate will block access to the rest of the available storage space. To retrieve anything will require completely removing the crate and placing it in an inconvenient location. No crates on Solo Skiffs!
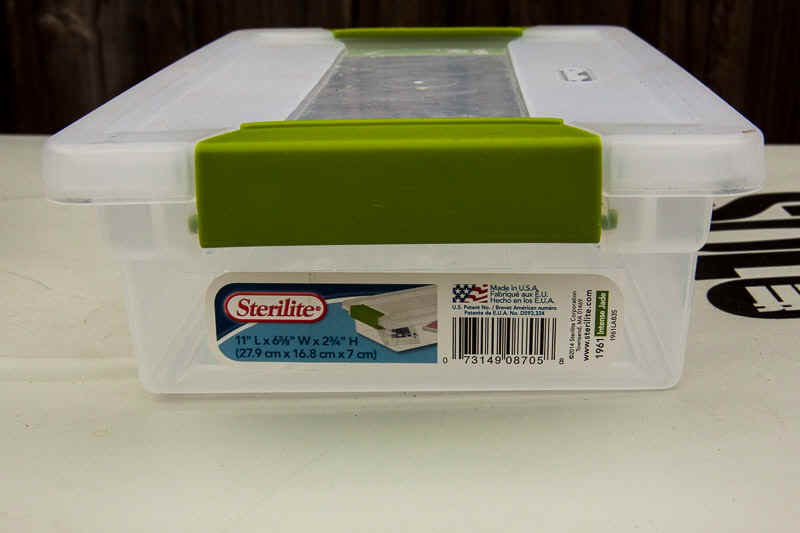
I found that Sterilite makes storage containers that seem to be custom fit to the Solo Skiff. (Or maybe the Solo Skiff was custom fit for the containers.)
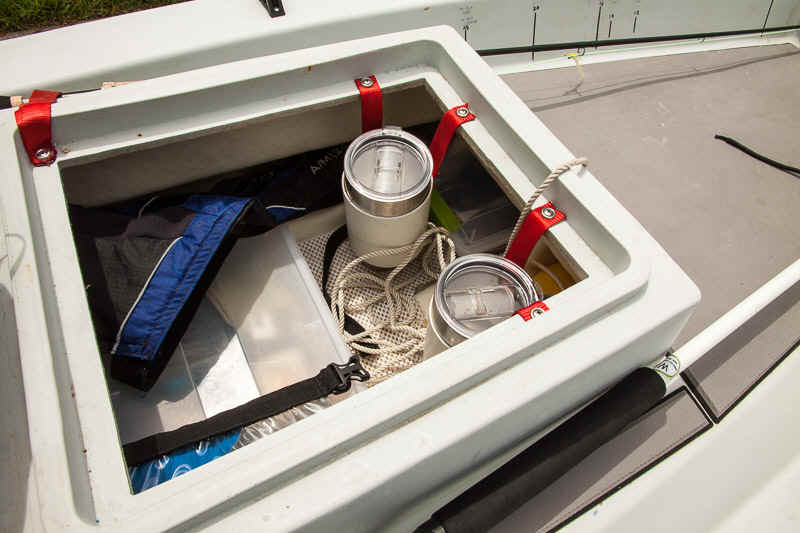
There are two sizes of containers that work well in the Solo Skiff. The larger of them is the 14"x11"x3.25" container. These fit perfectly below deck in the center space behind the hatch, under the transom.
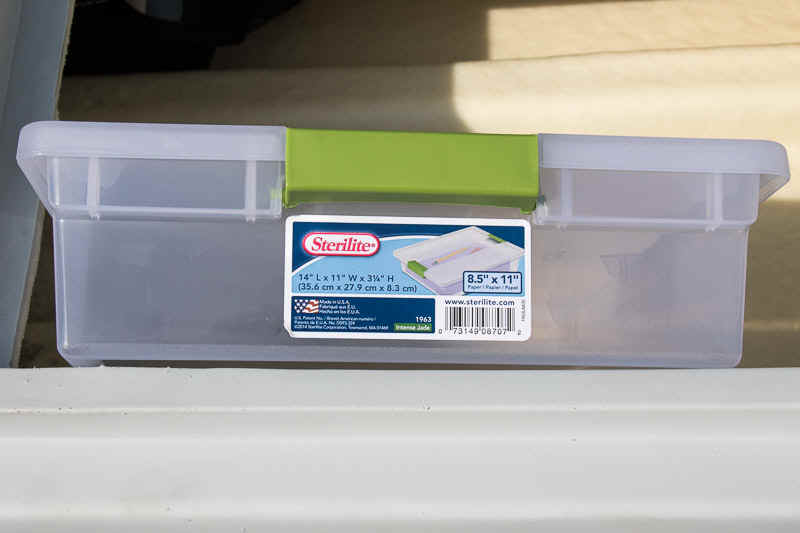
The smaller container is the 11"x6.625"x2.75" size. These fit perfectly under the the gunwales of the Solo Skiff.
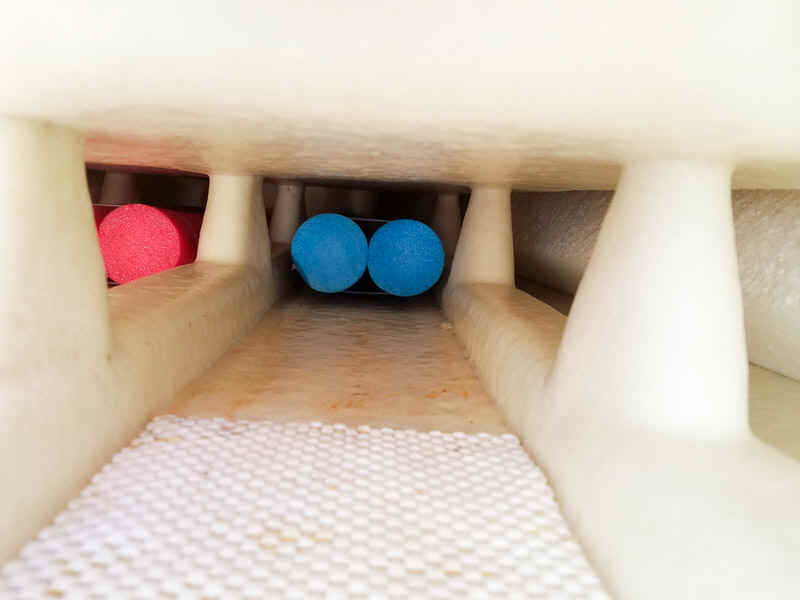
The Solo Skiff comes with foam blocks inside the hull for flotation. These blocks are very handy because they prevent stuff stored from going so far forward or aft in the hull that they would be out of reach. However, the center section of the hull has none. It is open all the way up to the built-in cooler. I have had things creep forward in the center section my hull far enough that I could not comfortably reach them. To solve this problem, I took foam pool noodles, cut them to length, and tied the ends together with cable ties.
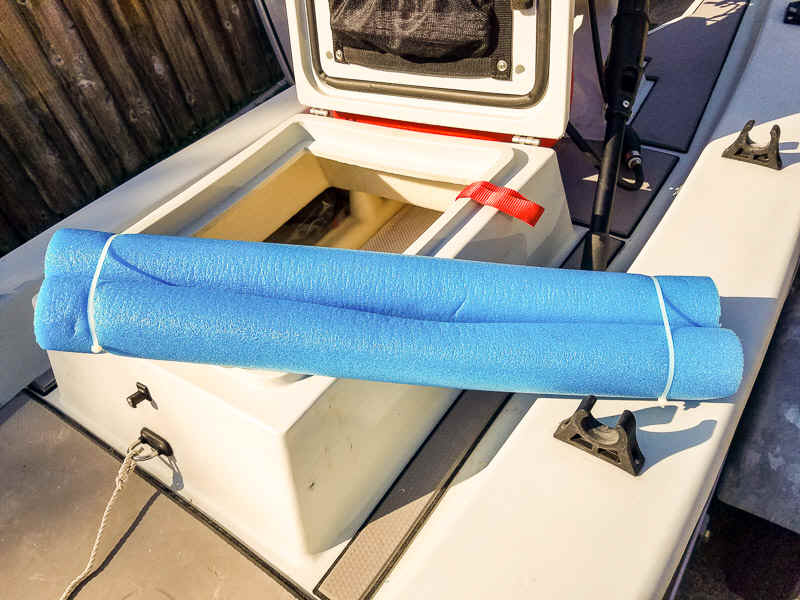
I put these in the center section and they keep everything in easy reach.
I also lined the floor of my Solo Skiff with shelf liner, using contact cement to hold it down. This keeps things from sliding freely.
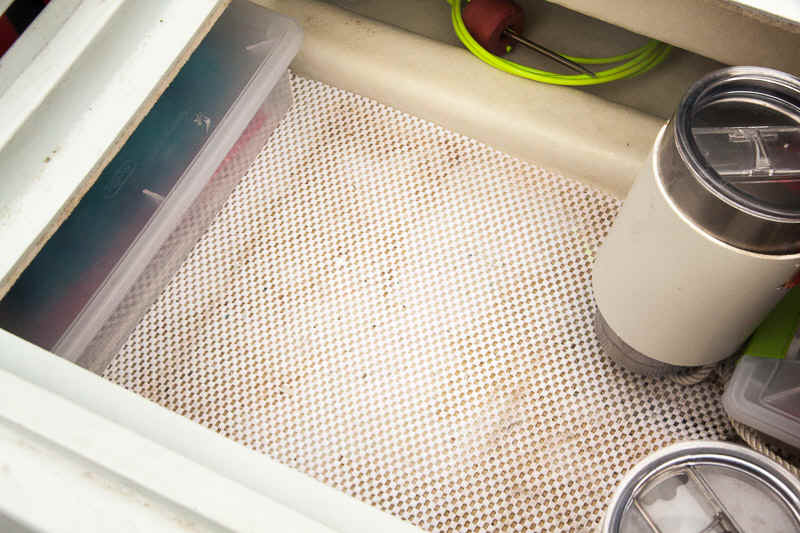
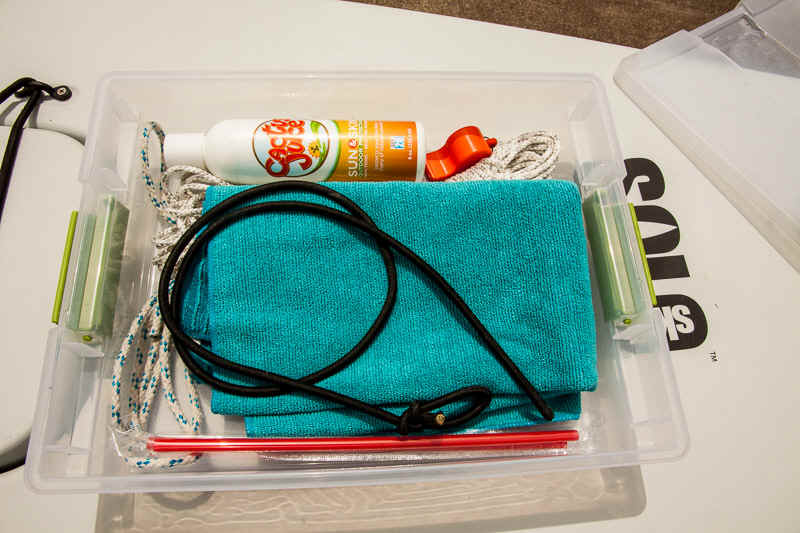
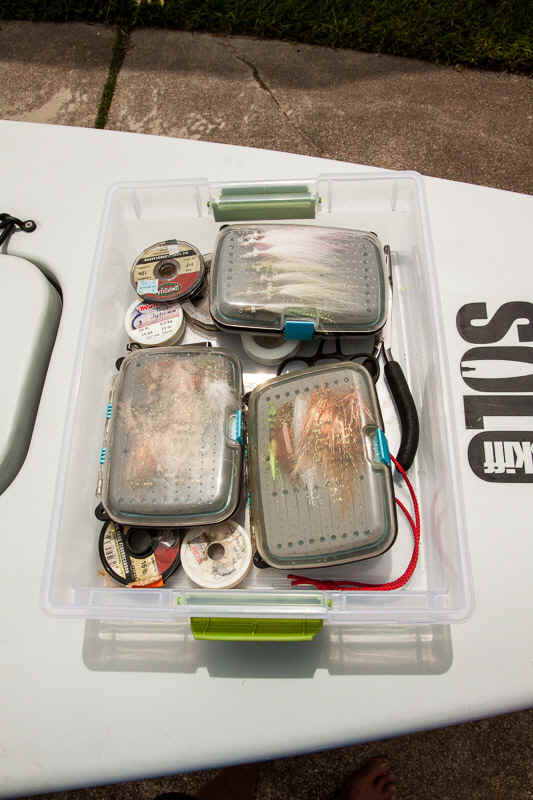
Taking advantage of these containers and ZipLoc bags, I have everything that you see sitting on top of my Solo Skiff in the pictures below stored below the deck.
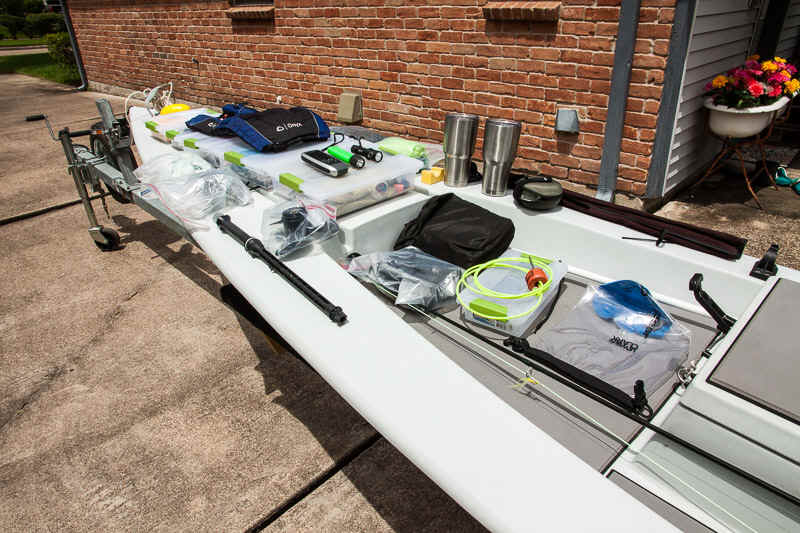
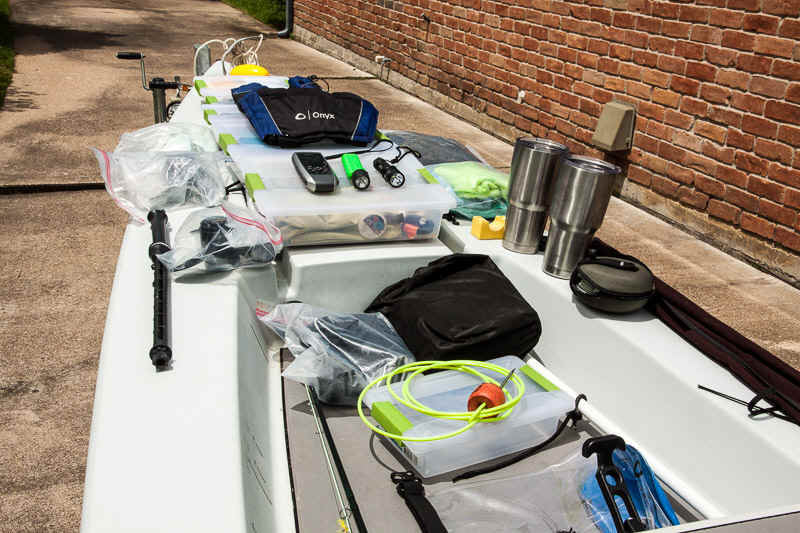
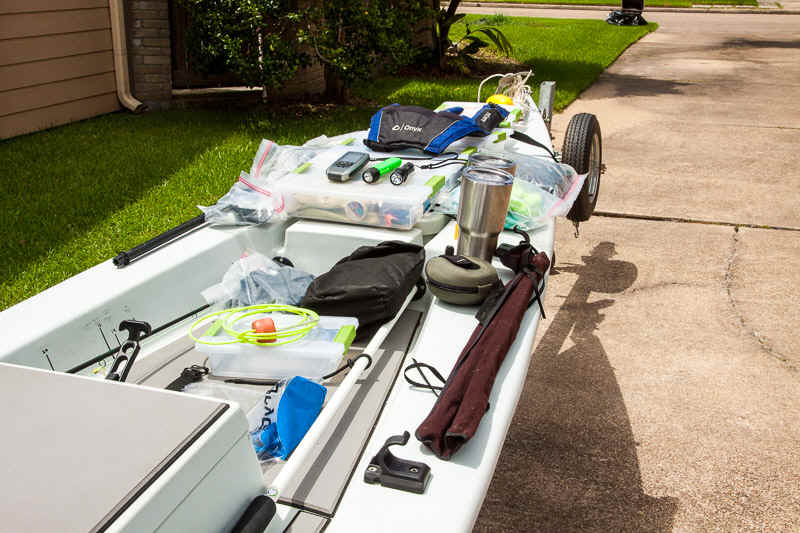
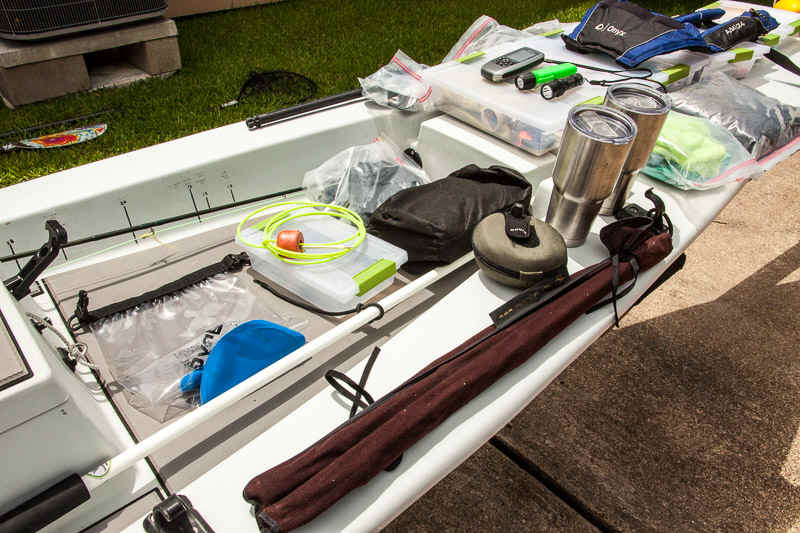
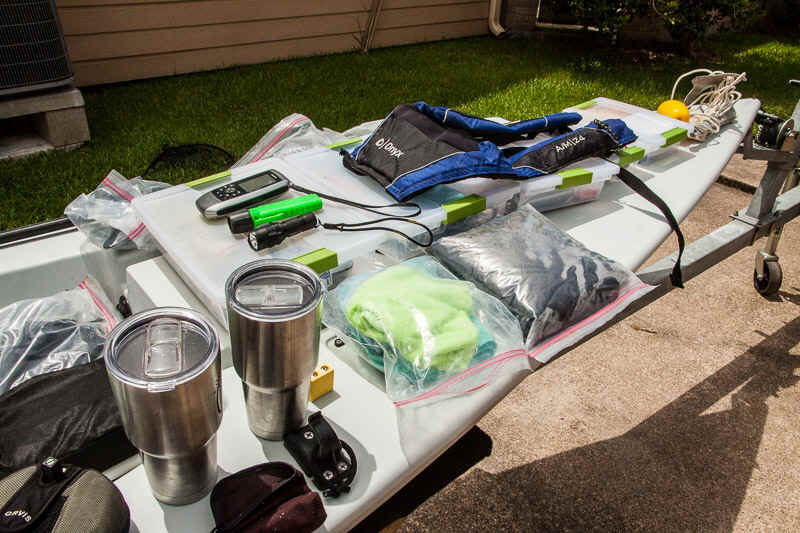
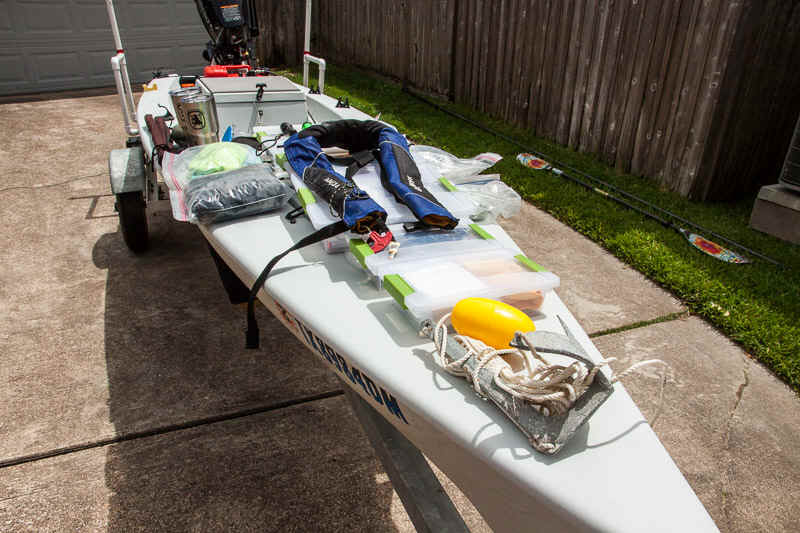
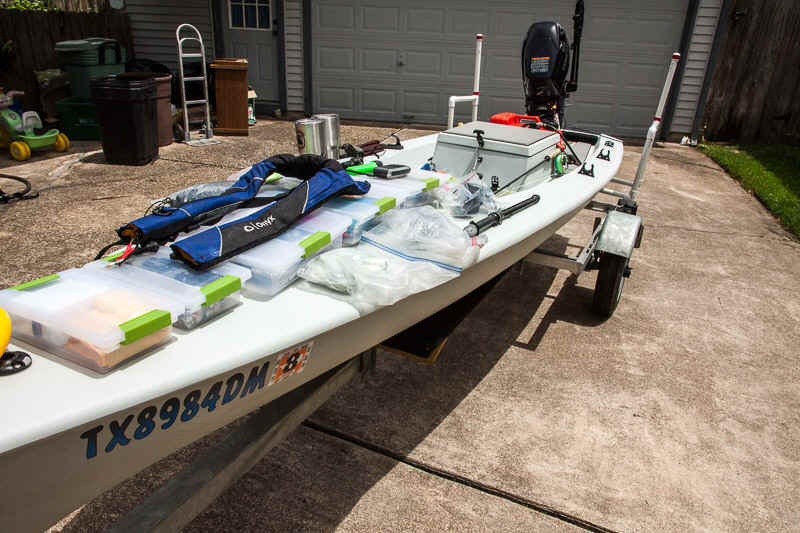
This is:
Contents of the first large storage container:
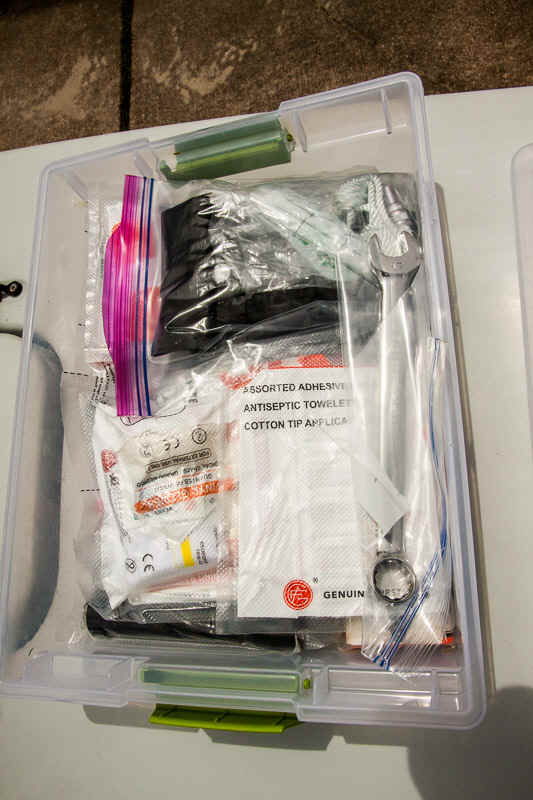
Contents of the second large storage container:
Contents of the third large storage container (my "tackle box"):
Contents of first small storage container:
Contents of second small storage container:
The third small storage container is empty, ready for whatever, and I still have room for a fourth one.
Try carrying all of that on a Bote!!!
In this picture, everything above is stored below deck. You can see that the space below the hatch is still very much empty, ready for whatever.
When I hook up my trailer and head out to fish, everything is already in my Solo. All I have to add is ice.
The simple Yak-Gear molded paddle clips hold my paddle securely.
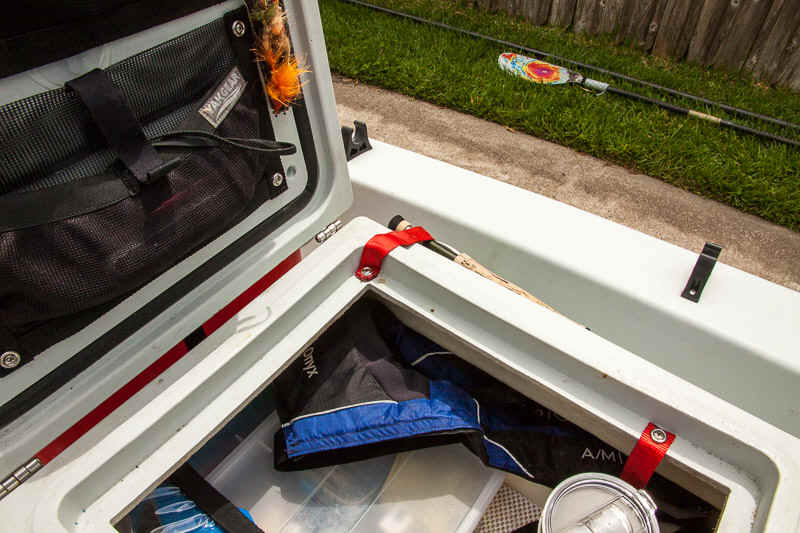
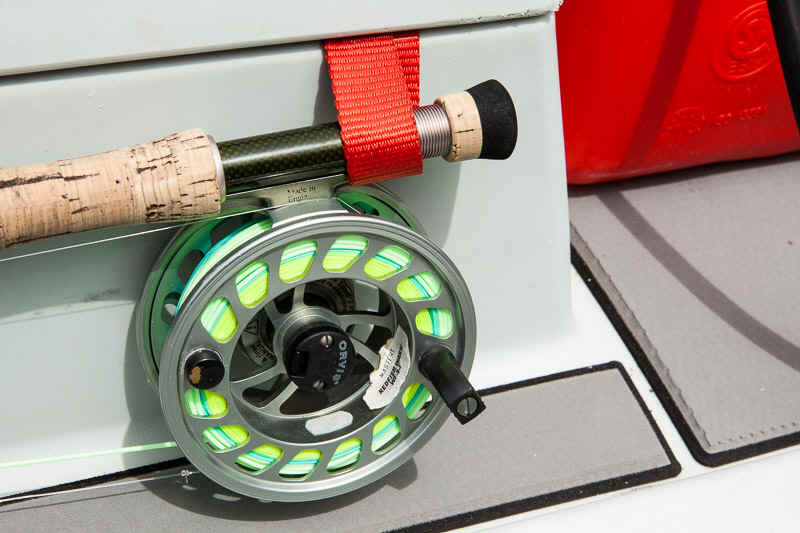
My fly rod is carried in the rod tube with the butt secured by a simple loop made of nylon strap.
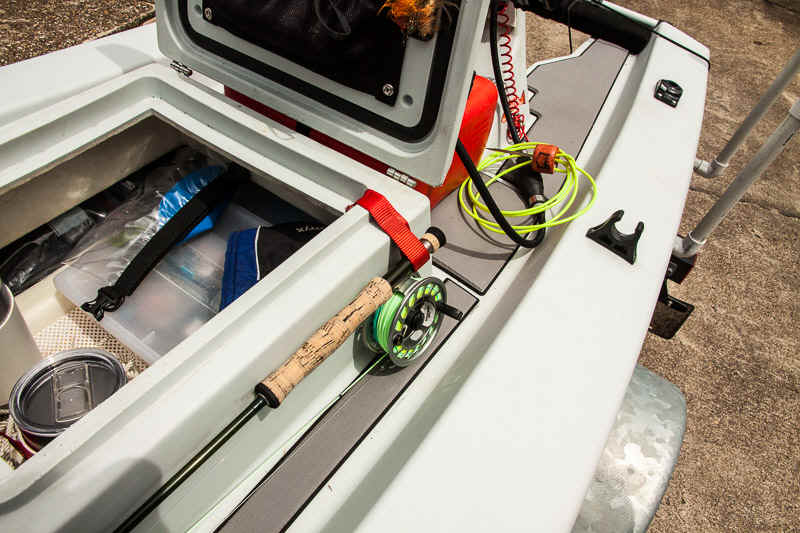
The strap is screwed down by a stainless sheet metal screw and trim washer.
This holds the butt of the rod securely. It is interesting that it is 9 feet from this point to the front of the rod tube, and that it is 9 feet from the opening in the rod tube to the grab bar on the stern of the Solo Skiff. Coincidence? I don't think so. I think that Tom Mitzlaff is a fly fisherman.
When trailering, I stuff a piece of foam around my fly rod where it goes into the rod storage tube. This prevents the bounce of trailering from chafing and weakening my fly rod.
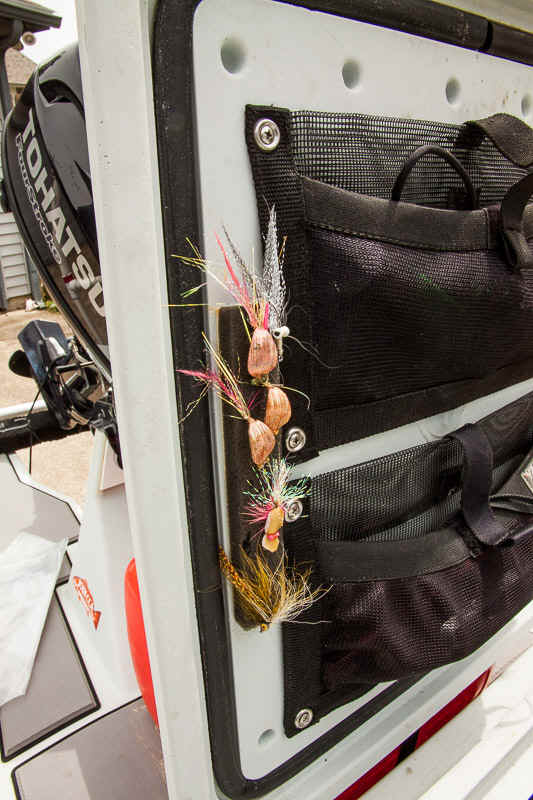
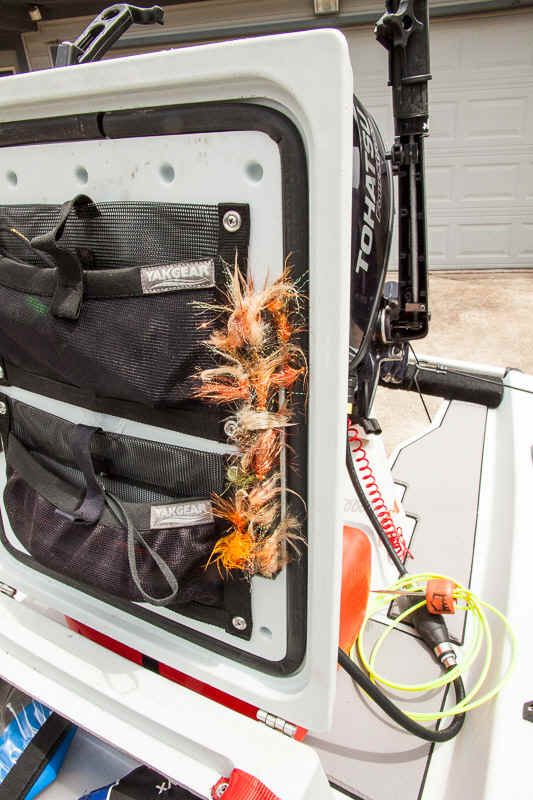
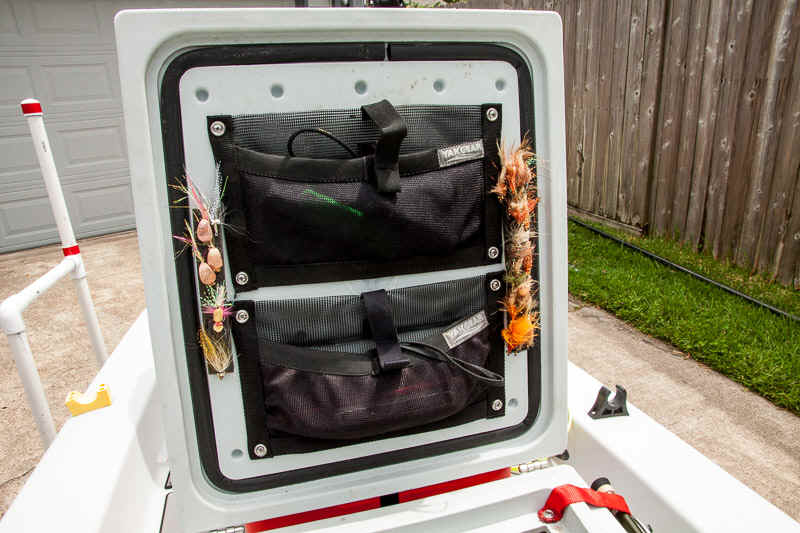
Although I keep a few boxes of flies inside the boat, I keep my primary flies quickly available on foam strips that are mounted inside the hatch with double-stick foam tape.
I also mounted a couple of Yak-Gear nylon mesh bags on the inside of the hatch. I keep flashlights, GPS, and my cellphone in them.
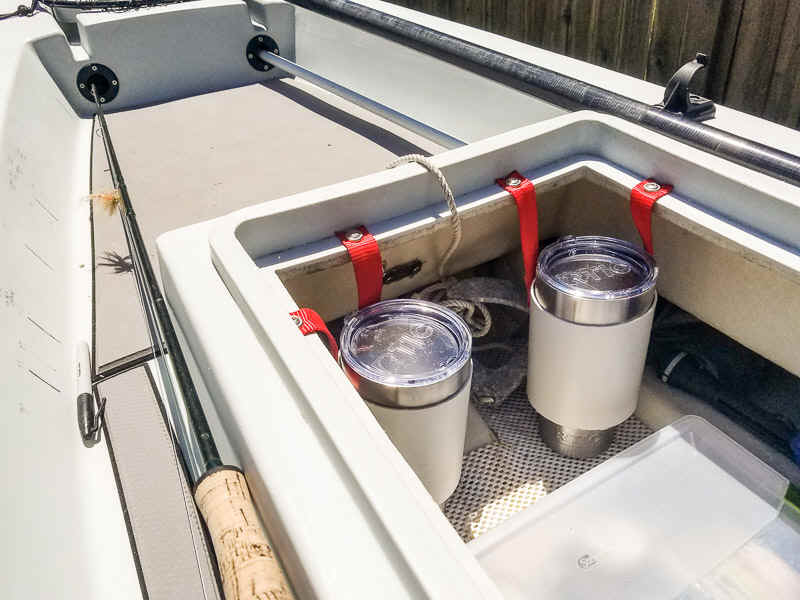
It took me a while to figure out how to carry cold drinks in the Solo Skiff. I like to have iced tea or Dr. Pepper aboard as well as water. Carrying drinks in the cooler area was difficult because the area was easily filled with ice and fish, and I do like my drinks to not taste like the slime of fish.
The solution eventually came to me. A 30 ounce Yeti-style cup fits perfectly inside a piece of 4" PVC drain pipe. I cut slits along the top and put some nylon strap material through the slits, and hot-glued the straps to the PVC.
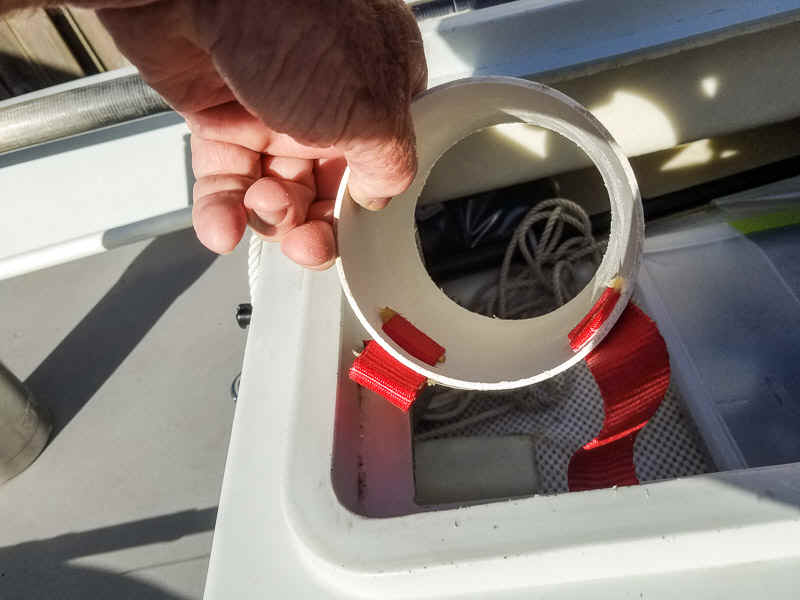
Next, I screwed the straps to the inside of the hatch cover with stainless sheet metal screws and trim washers
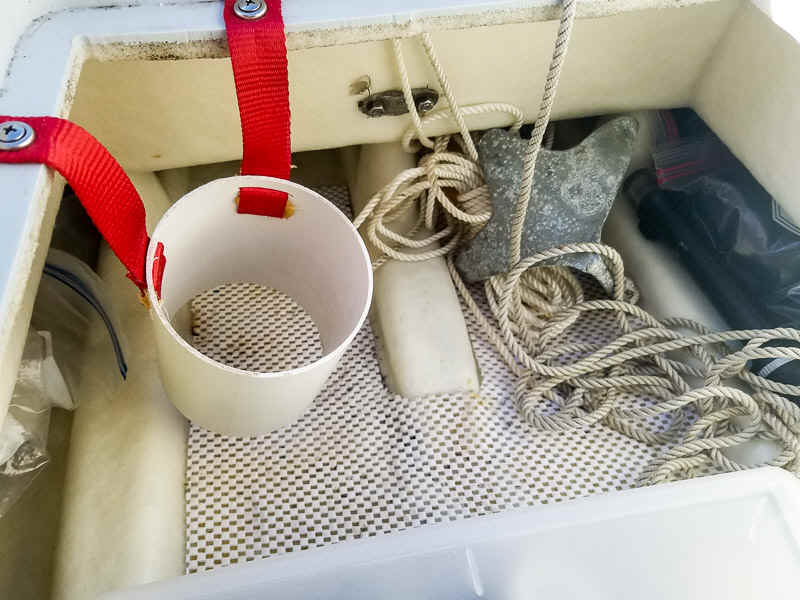
Voila! A cup holder!
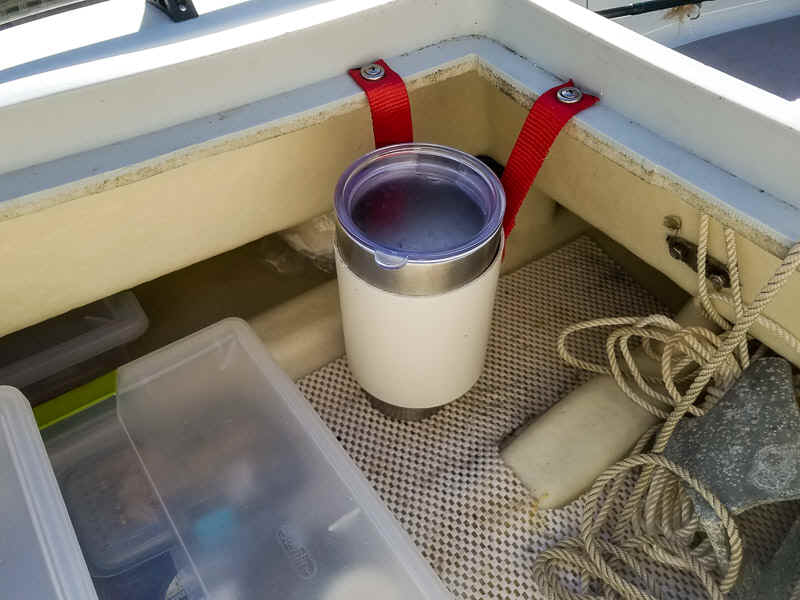
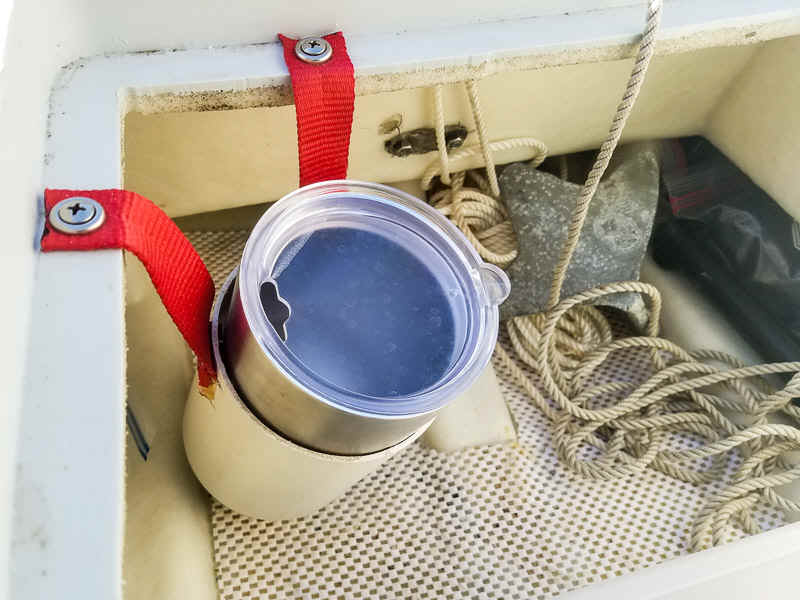
The cup holder easily swings up out of the way so that I can access the stuff that is stored behind it.
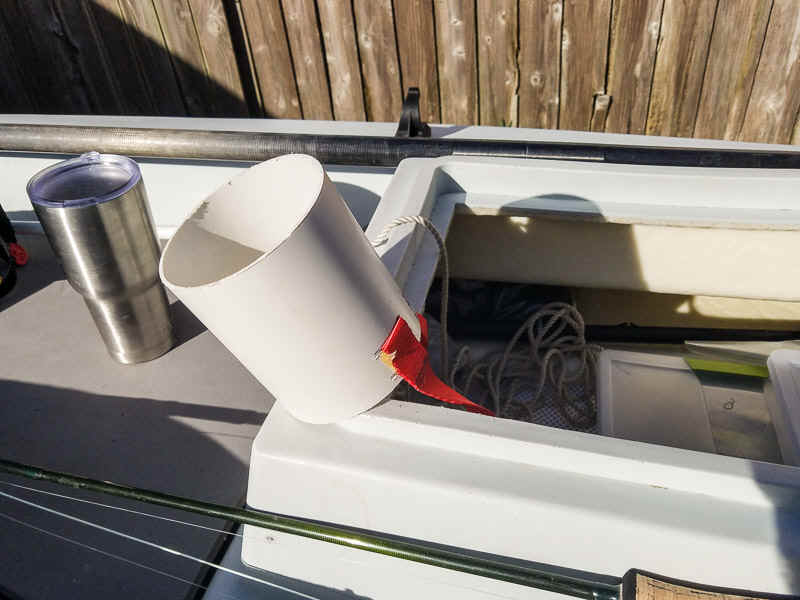
This worked so well that I added a second cup holder. I load the second cup with clean ice so that I can have clean ice available for drinking all day.
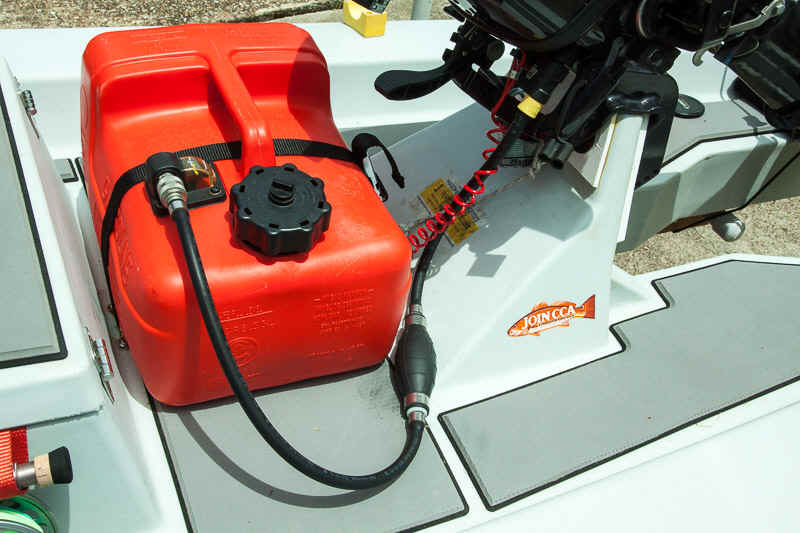
I secured my 3 gallon tank with a nylon strap kit.
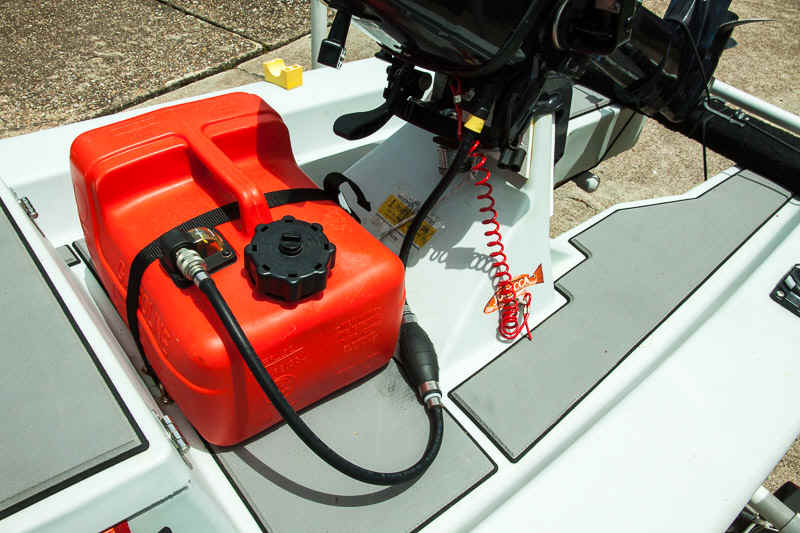
There was no need for the 6 feet of fuel line that came with the engine and tank, so I cut the it down to only 34 inches long for neatness.
I believe in good running lights - not just for legality, but more for safety. I am on the water very often well before sunrise. I don't know who it frightened more - me or them - but I have more than once had very near collisions with kayakers out in the dark that had no lights. All it takes is a few seconds of looking away and a dark kayak can be right on your bow.
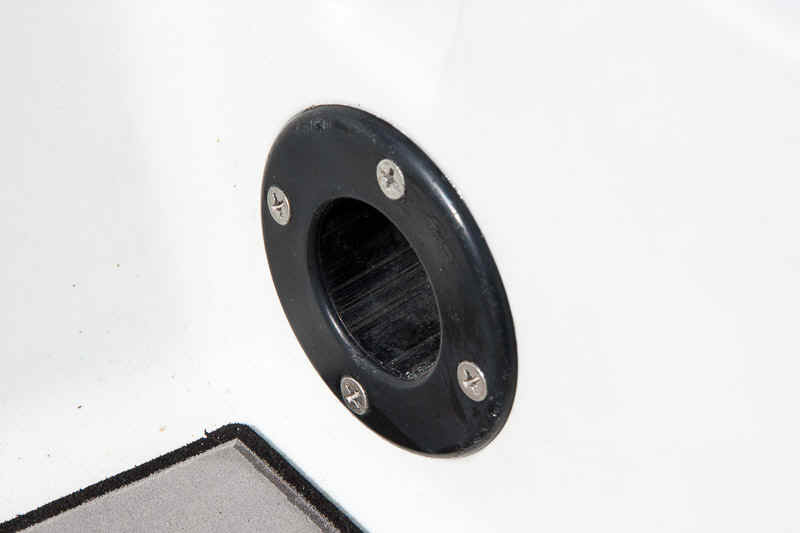
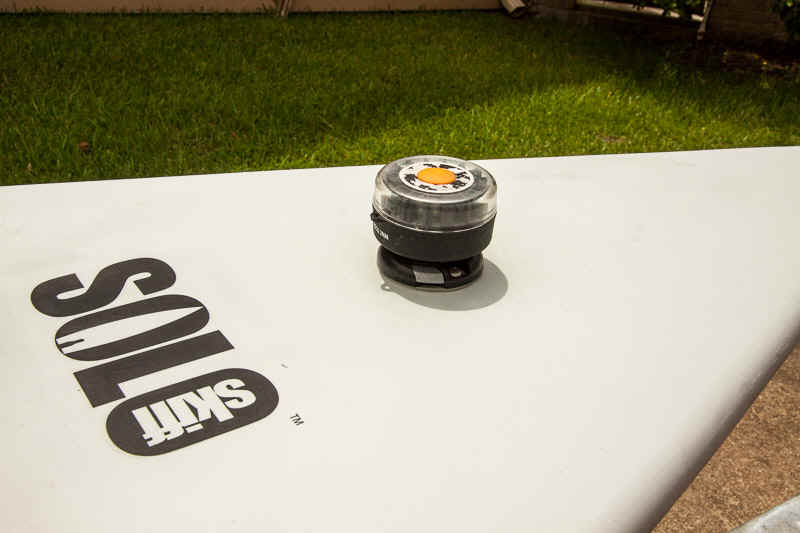
For my bow light, I mounted a Railblaza Starport through the deck. With the light removed, the deck is still clean.
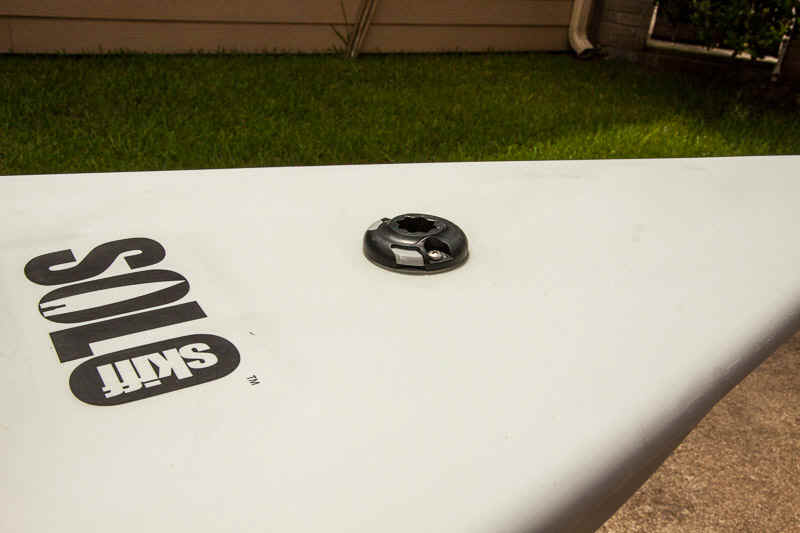
My NaviSafe tri-color light mounts in the StarPort. I remove the bow light as soon as the sun rises to keep the deck clean.
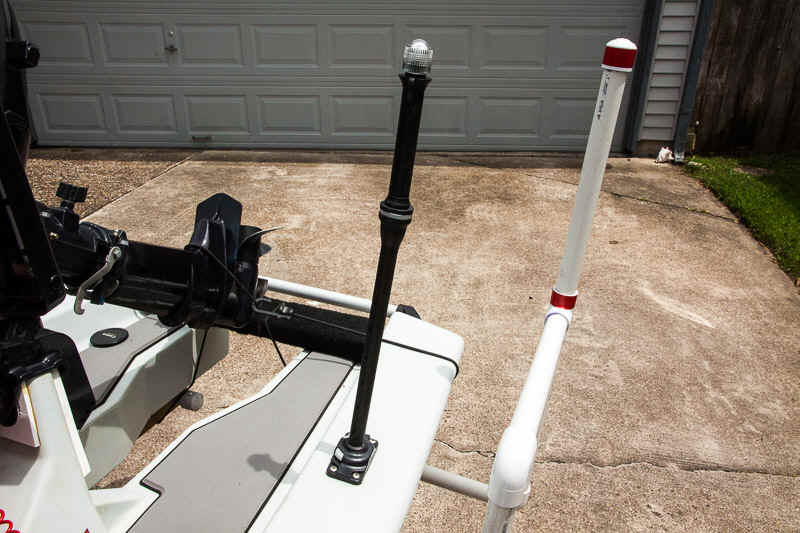
I added a Railblaza Starport HD mount on the stern to hold my all-round white running light.

Like the bow light, I remove the stern light as soon as the sun is up.
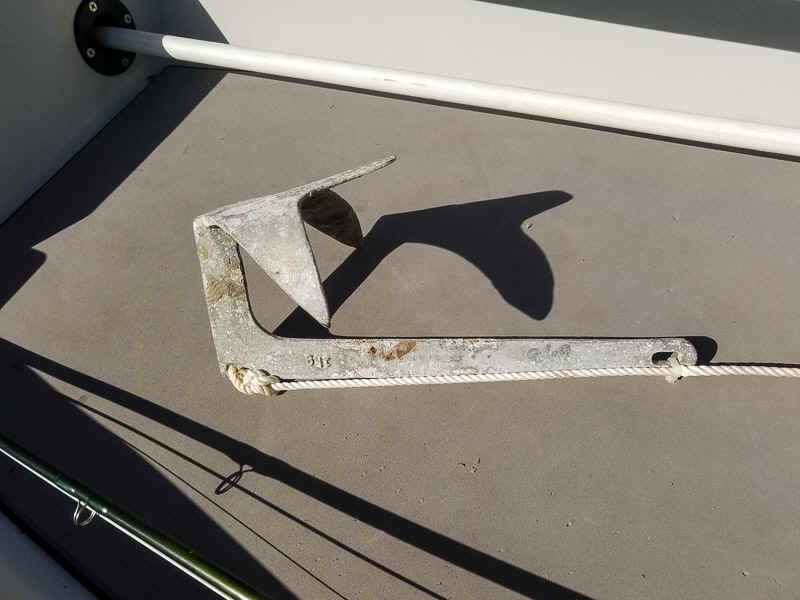
I keep a 1 kg (2.2 lb.) anchor below deck. I find the anchor very useful when fishing the flats. There are many times that the bottom is too hard for my stakeout pole, and there are places where slipping the anchor over the side is quieter then planting the pole. Also, an anchor is a very important safety item on a boat. An anchor will prevent you from drifting to wherever if your engine fails in deep water.
I like to keep my bow neat - again, something to avoid getting line tangled on. I simply use the original stock handle to pull my Solo Skiff on to the trailer. When I put the boat in the water, I remove the handle and store it below deck.
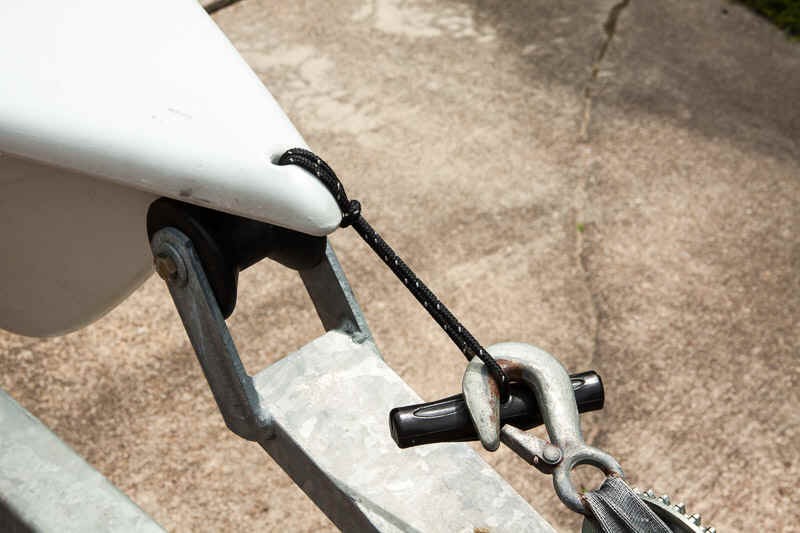
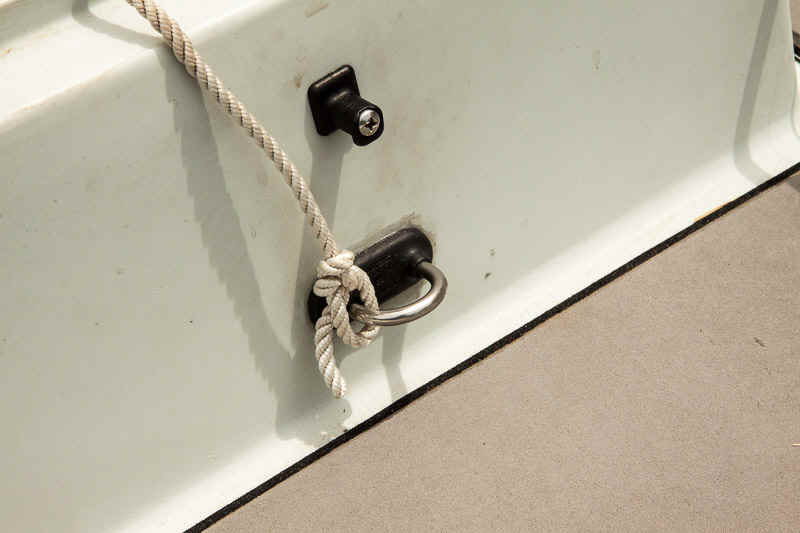
I find it handier to have the dock line in the middle of the Solo Skiff than on the bow or stern, so I put a pad eye on the front of my hatch base to hold my dock line. This also lets me keep the bow of the boat free of any potential snag points. This eye is also where I tie my paddle leash if I am using my paddle, and where I tie the line to my stakeout pole when I am using it.
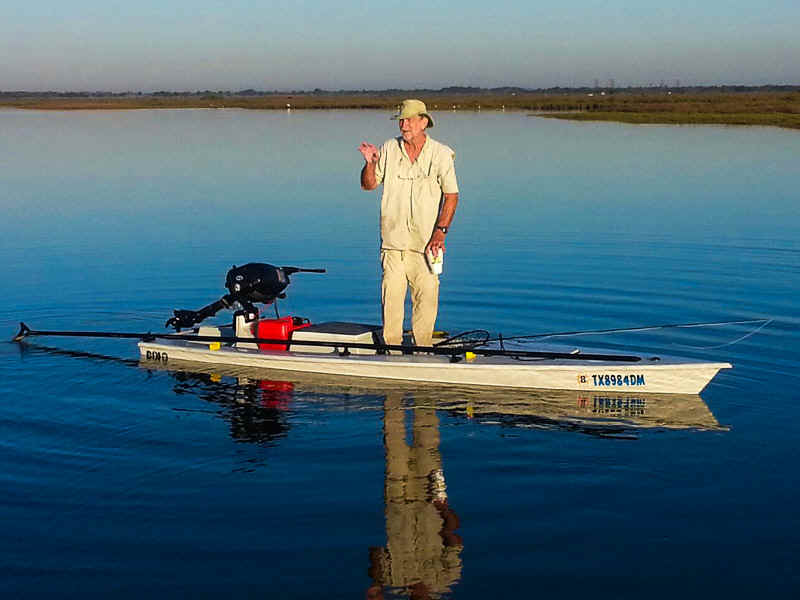
This is me taking a break out on the flats in my fantastic fishing machine.